Look for

Friday, September 29, 2017

Free crochet patterns: Tiger and Kanga


These were my first creations. In those days I did not even think of designing dolls. I just bought a book about Winnie the Pooh for my grandson and decided to create characters of the book.
I crocheted in free form, but just in case, only that to be able to repeat my crochet, I recorded the sequence of the rows. Unfortunately I did not make step-by-step photos, but this toys are fairly simple to work. Overwise the wireframe for kangaroos turned out not simple. Kanga was needed two-pieces skeleton.

Of course, the products are far from perfect, but if someone likes it I will be happy.
You can find it in my Ravelry store


Wednesday, September 27, 2017

Tutorial: Wire frame for your amigurumi toy/doll

I like to make amigurumi with a skeleton inside.
Of course, for children under 10-12 years (depending on their temperament) it is better not to give such toy into their hands (or at least not to leave them alone with it).
But if you want to make a gift for a teenager or your friend, there is nothing more amusing than a doll, that can be given any pose. This doll is much more interesting than soft toy standing on the shelf and leaning on the wall.


DSC_0355.JPG


My favorite wired toy is my frog. He will be an example for this small tutorial on making a simple frame for amigurumi.


1. Make measuring:
- the distance between the fingers along both hands - L(arms) (for my Frog it’s 16 cm)
- the length of the Body together with the Legs and the Feet - L(body) (14 cm)
лягущка с каркасом.jpg


2. Cut  2 pieces of aluminium wire, the length of each one:  ½ L(arms) + L(body) + 0.5 cm   (= 8+14+0.5= 22.5cm)


3. Make a ring at each end of the wire.


DSC_0604.JPG


4. Measure off ½ L (arms) - 1 cm along each piece   and bend the wire 90 degrees.


5. Twist together the wire pieces as shown on the photo.


6. Try on the skeleton to the Body. If it necessary, remove an excess of the wire.


DSC_0611.JPG


7. Put the skeleton inside the Body. The bend at the ends of the wire must get inside the Paws.


8. Fill the Body around the skeleton firmly, especially the bottom part.


This skeleton is very simple. More difficult option with a head part see in my pattern The Hare Family.
My Ravelry Store

Tuesday, September 26, 2017

My Pudgy Toys

Once, when I just started my toys creation, I needed a body for my elephant doll. I wished him to be a cute, pudgy baby elephant with a big head and huge ears. Like this one


Among a lot of free patterns I did not find a fit option. I only saw a toy with such belly as I imagined. Instead buying the pattern I decided to "turn on my own brain" (as my husband says).
After a couple of days of insistent experiments I got the wished result.


IMG_20151001_115012.jpg


And the real secret of such nice belly is that you need to make a few increases above the joining of legs. Only after that you have to make increases along the body.


I just have fell in love with this type of a body. I make pudgy little piggies, hippos, hedgehogs, dragons and even the Santa Claus.

You can find the detailed pattern in any of these my patterns:


общее фото.jpg

Saturday, September 23, 2017

A small tutorial on sewing amigurumi details

I know that many crocheters (especially beginners) don't like sewing of crocheted details. I have to admit I too really disliked this work at first. Then, in time, I learned some sewing seams, and this process has ceased to be so exhausting for me.
 Now I often include this small tutorials on sewing in my patterns for sale.
Today I want to share one of my ways to sew amigurumi details. This method is great for sewing the head to the body, for example.

1. Begin from a sewing stitch on the body. Get out your thread from inside to front side. Make a sewing stitch behind the vertical loops of the head's opposite stitch.


DSC_0474.JPG

2. Come back into the same stitch of the body. Pass your needle behind the vertical loops of the stitch, get it out into the next stitch.

DSC_0470.JPG

3. Repeat steps 1, 2. Sew each stitch twice!

DSC_0477.JPG

This method fit for sewing details as with opened finishing holes and as well with closed holes.

DSC_0338.JPG

The Hippo's Snout is sewed the same way, but this case your needle have to pass  through the nearest stitch of the Head.

Try this method, it's so easy! Happy stitches to you!

Saturday, September 2, 2017

Special for fans of "Game of Thrones"

Get ready : Winter is coming!


I have listened up to your numerous requests and tried to finish this pattern as fast as it were be possible. (And its first buyers seem to be very happy with the purchase.)


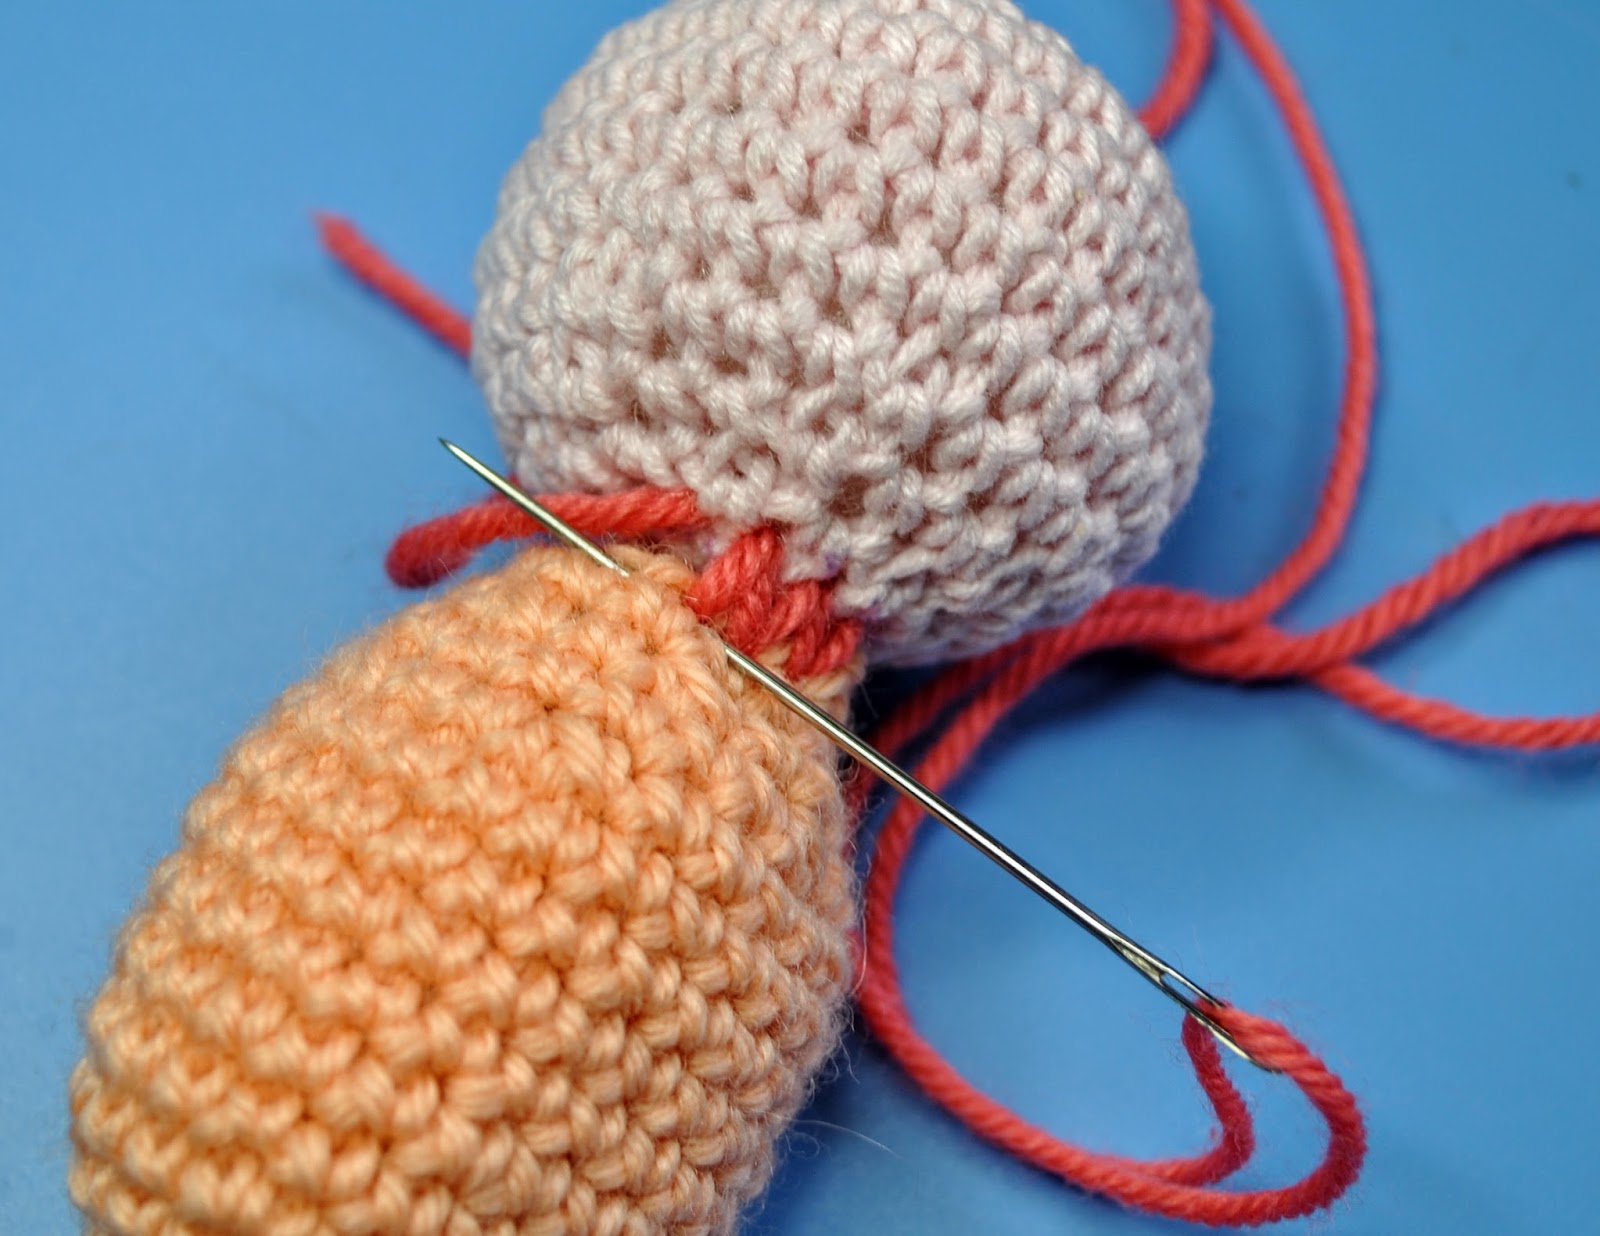
Of course, for this work you need some previous skills of crocheting. I tried to describe detaily all steps of making the Dragon. It took 26 pages including 37 photos.
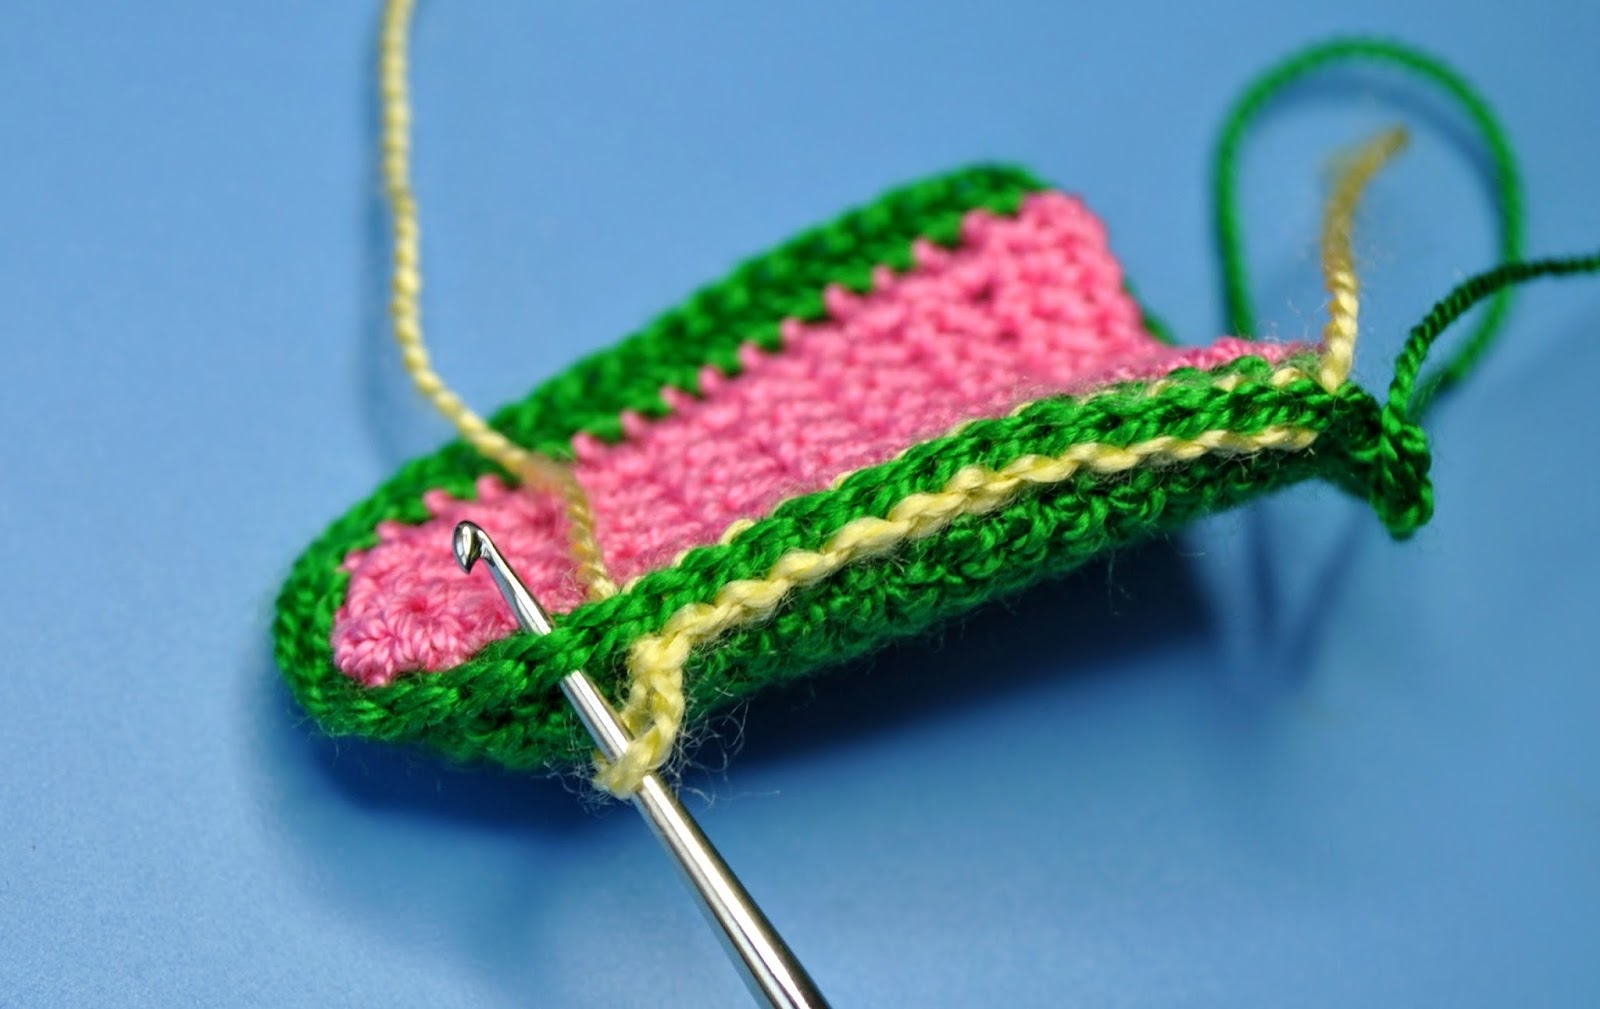
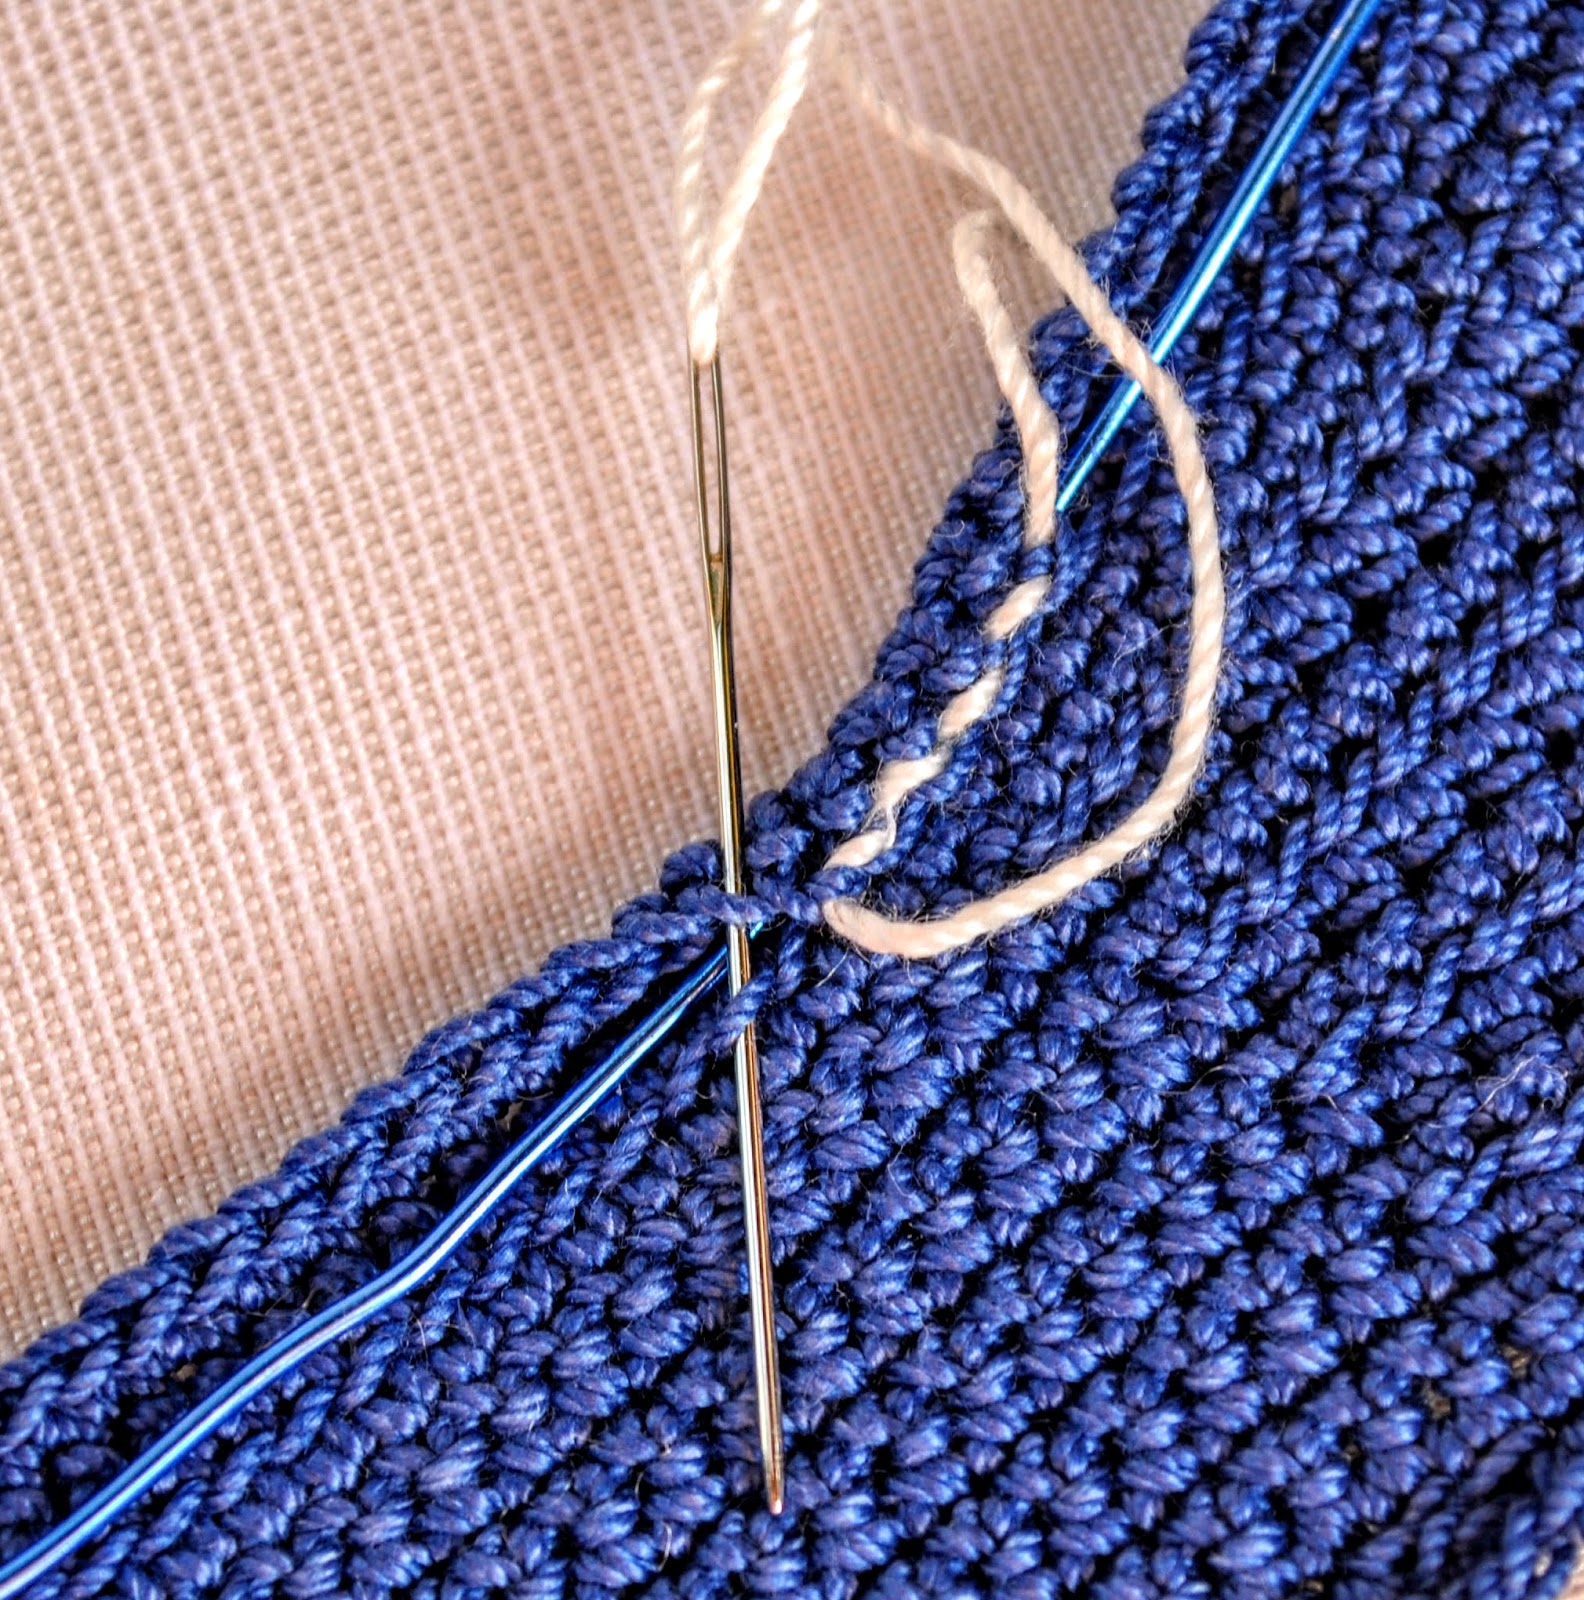
The photos show not only a ready details, but also some special ways of crocheting and sewing process. For example:

DSC_0769.JPGDSC_0156.JPG
By the way about the sewing: a lot of work wait you. Therefore, usually I advise the best way of sewing together the certain details.
Also I have exactly described the order of making the Head and the Body.

Of course, this pattern is written in English.
My English is not perfect, but I really worked hard. In other words, the pattern is written in simple English using with worldwide terms of crocheting. I think it’s very good for crocheters whose native language isn’t English. However, I did not receive any complaints from my previous buyers.

My terms of sale are:

  • You can show off your Dragons on any sites, but please inform about my authorship of the pattern and share this link https://ellacrochetedtoys.blogspot.com/ to my blog
  • You can sell your Dragons in any online stores
  • You may not share my pattern or its translation into another language.

I know that some crocheters like to print a pattern, so except the full version (PDF-file with photos is 12,3 MB) you will receive also PDF-file for printer (without photos, 377 KB, 18 pages).

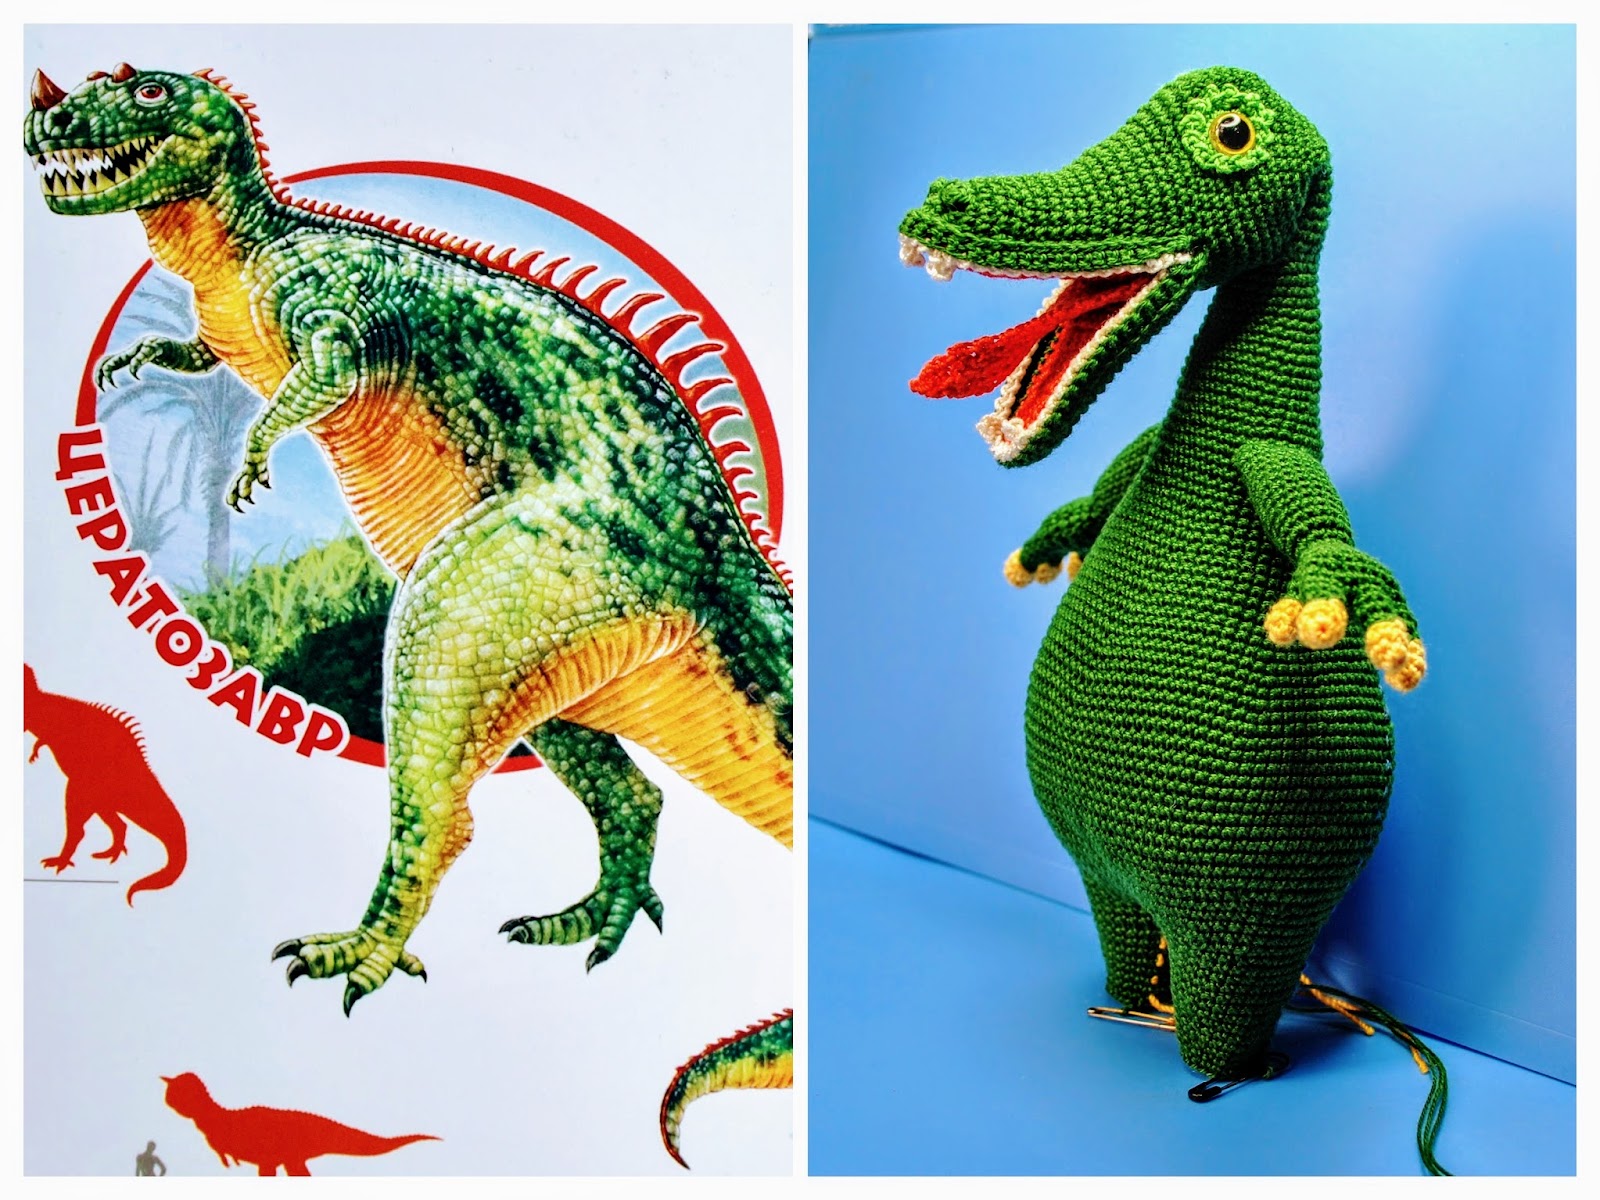
I know from facebook comments that some beginners also would like to create  something like this Dragon. So now I'm working on a simpler version of this toy.

DSC_0300-COLLAGE.jpg

It will be a Dinosaur: without wings, but with legs and opened jaws. And it will need much less sewing work.

I promise that all buyers of this Dragon pattern can receive free of charge the Dinosaur pattern.

So, you can purchase this Blue Dragon pattern for $ 3 on my eBay page