Look for

Showing posts with label a secret of crafting. Show all posts

Wednesday, October 18, 2017

Tutorial on Face Sculpting by Tatyana Meshcheryakova

I present to you this magnificent tutorial by a russian crafter Tatyana Meshcheryakova. It does not include a lot of text, but there are many step-by-step photos.


To make understanding easy for you, I made an English cheat note for the head pattern (although I do not think it's necessary to crochet just such a head) and two paragraphs of the description.


Head
1 round – 6 sc in magic ring (6)
2 round – 6 inc (12)
3 round – (1 sc, 1 inc) – 6 time (18)
4 round – (2 sc, 1 inc) – 6 time (24)
5 round – (3 sc, 1 inc) – 6 time (30)
6 round – (4 sc, 1 inc) – 6 time (36)
7 round – (5 sc, 1 inc) – 6 time (42)
8 round – (6 sc, 1 inc) – 6 time  (48)                                 
9 round – (7 sc, 1 inc) – 6 time (54)
10 round – (8 sc, 1 inc) – 6 time (60)
11 – 21 rounds – 60 sc
22 round – 12 sc, 6 inc, 11 sc, 6 inc, 25 sc (72)
23 – 28 rounds – 72 sc
29 round – (10 sc, 1 dec) – 6 time (66)
30 round – (9 sc, 1 dec) – 6 time (60)
31 round – (8 sc, 1 dec) – 6 time (54)
32 round – (7 sc, 1 dec) – 6 time (48)
33 round – (6 sc, 1 dec) – 6 time (42)
34 round – (5 sc, 1 dec) – 6 time (36)
35 round – (4 sc, 1 dec) – 6 time (30)
36 round – (3 sc, 1 dec) – 6 time (24)
37 round – (4 sc, 1 dec) – 4 timeа (20)
38 – 40 rounds – 20 sc
Fasten off, cut the yarn


Sculpting for eyes
I use the same thread I have crocheted. Put the needle inside through the neck hole and get it out 1 round above the 6th increase of the 22nd round. Make a sewing stitch of length 2-3 loops. Get the needle out through the hole. Pull the thread (not tightly), knot the ends of the thread.


Make the same for the second eye. Put the needle inside through the hole, but bring it out one round above the 7th increase of the 22nd round.


For the sculpting of a nose I use a sewing thread. You can use also dental floss or monofilament of your choice. Mark the outline with pins. Top pins set approximately between 17 and 18 rounds. The distance between them is 6 loops. Place the lower pins between 26 and 27 rounds. The distance is 8 loops. Then work according to the photos. In the process, after each sewing stitch tighten the thread a little, trying to form a nose.

Monday, October 16, 2017

A small dictionary for translating Russian-language patterns

From time to time I see in amigurumi groups requests for english author versions (or translations) of russian-language patterns. As you know, to translate any pattern (even free one) into another language without permission of its author is a violation of copyright. But, unfortunately, the authors rarely respond to such request for translation. And Google Translator does not help in this case, because there are a lot of special crocheting terms and abbreviations, so such translating comes out just awful.


To solve the problem, I share a small dictionary of "Russian crochet language" (such an english-russian dictionary has very much helped me once).


Here you will find a list of abbreviations and russian crocheting terms. The list is based on several popular Russian-language patterns that do not have the english versions.

Dear amigurumi crocheters!
If you have any problem translating any Russian-language pattern, you can ask for help on my Facebook special group "Help with russian pattern". As well you can find here many interesting russian patterns in english.


Условные обозначения:
Abbreviations:
СС = сс = соединительный столбик
a slip stitch
ВП = вп =  в.п. = воздушная петля
a chain(s)
СБН = сбн = ст. б/н = столбик без накида
a single crochet
ПСН = псн = пссн = полустолбик с накидом
a half double crochet
С1Н = с1н = столбик с 1 накидом
a double crochet
УБ = уб = убавка
a decrease(s)
ПР = пр = приб = прибавка
an increase(s)
п/петля (задняя или передняя)
a loop of stitch (back or front)
пропуск = пропустить
to skip stitch
поворот = повернуть
to turn


пр*6 = (приб) - 6 раз = прибавка повторить 6 раз - (1 increase) repeat 6 times
уб*6 = (уб) - 6 раз = убавка повторить 6 раз - (1 decrease) repeat 6 times


3 сбн вместе - 3 sc crochet together
4 шт. - 4 pieces


без изменений - no change, to work even


вяжем прямыми и обратными рядами - to crochet in back-and-forth rows
вязать = провязать= вяжем = вяжите - to crochet
вязать по кругу - to crochet around
вышить - to embroider


замкнуть в кольцо - to make a ring
закрыть = закройте - to close up (usual about the finishing hole of round detail)
закончить - to finish, to fasten off, to work off


нам потребуется - we (will) need
нить = пряжа - a yarn, a thread
набрать 4 вп - to pick up 4 ch
начать во 2ую вторую от крючка петлю - to begin into the 2nd stitch from the hook
набивать = наполнять = наполнить = набить наполнителем = заполните - to fill, to stuff with a filler


повторить - to repeat
пришить - to sew
присоединить = прикрепить - to add (about yarn), to attach (about parts of doll)
проволока = проволочный каркас - a wire frame


стянуть = стягиваем - to pull, to tighten
сменить нить на ... -  to change your yarn color to ...


оборвать нить - to cut off the thread (yarn)
оставить нить для пришивания - to leave a tail (of the yarn) for sewing
обвязать по краю - to crochet along the edge
обвязать сбн вдоль ... - to crochet sc-row along ...


р, ряд - a row, round


утяжка = утяжки - (to make) sculpting

Friday, October 13, 2017

A little advice on crocheting very narrow amigurumi details

Each crochet master has "the best way" for this weary work. Today I wish to share my little secret.
When I make a narrow piece (finger, arm, leg, tail : I prefer a mercerized cotton thread, so my such details are really narrow), I use a bead of suitable size.


In the process I add the filler below the bead. And I put the bead on top again. The bead also prevents getting out the filler fibers from the part.

But you have to hold the detail putting your fingers exactly upon the bead!

Sunday, October 8, 2017

Secrets of crafting: How to Create a Stable Doll

I love and often make dolls that can be standing.


DSC_0257.JPG


Making a surefooted doll is not so easy. There are many factors to consider.


First, in the toy shape you need to keep a balance. A massive muzzle in front should be balanced with a tail or a massive backside.


DSC_0601разм.jpg


Secondly, the greater the volume of the toy body, the greater should be the feet. When crocheting from the bottom, you can later make decreases in order to the toy legs would looked not too thick.


And thirdly: the surface of the foot have to be flat as it is possible.


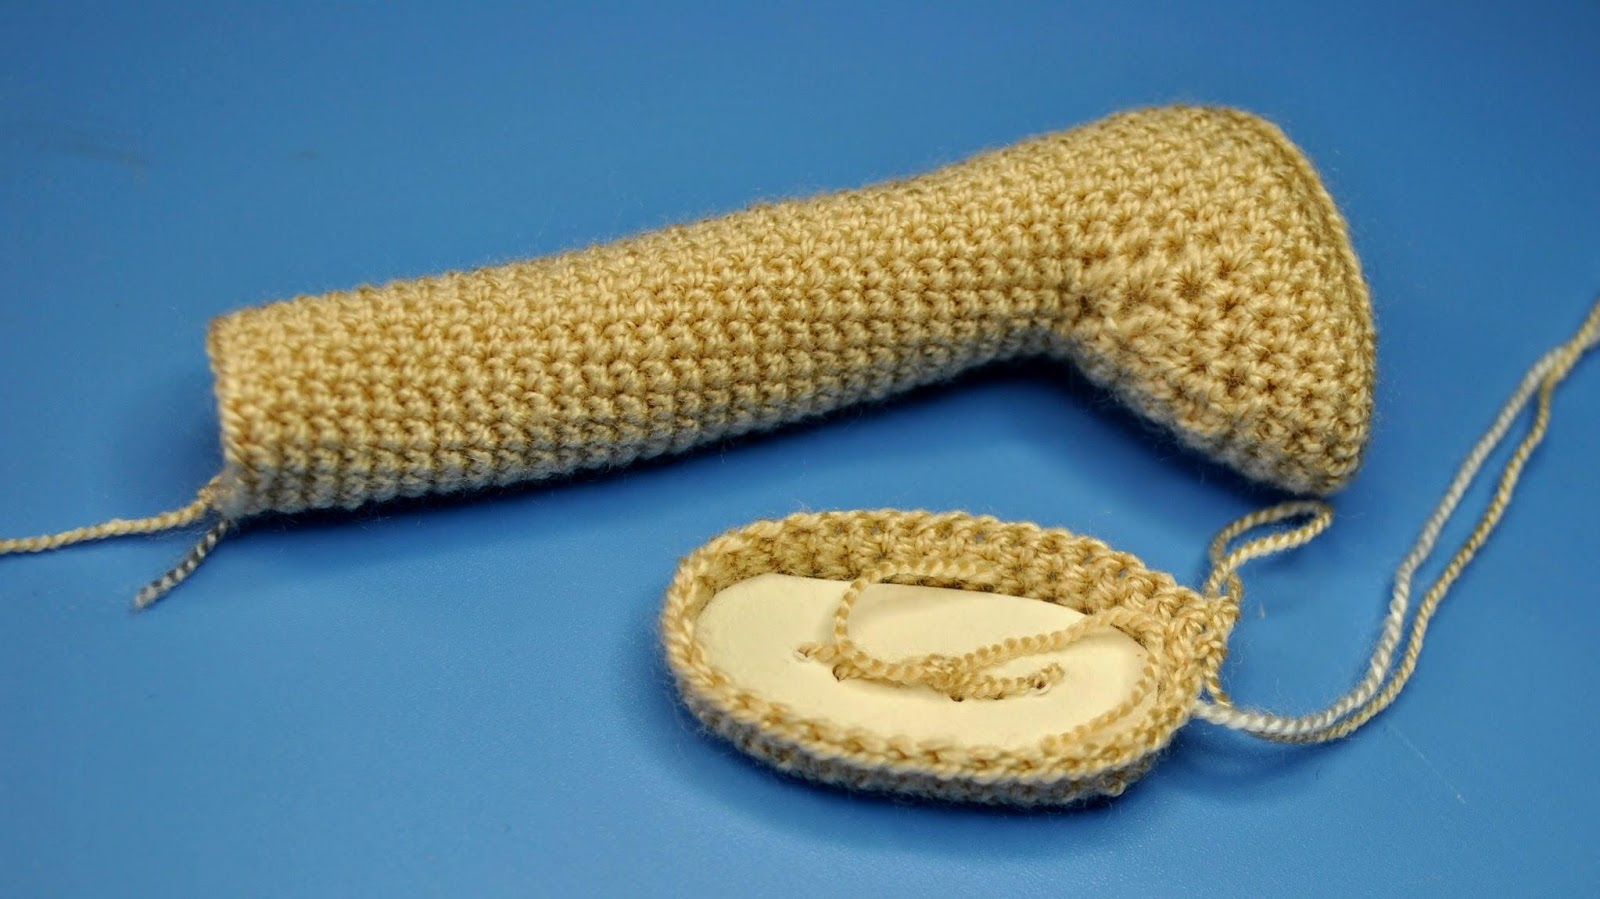
I usually use a thin cotton thread or acrylic, so I have no problems. If you use more thicker yarn, I would advise to sew up a fabric lining to the doll's foot.


And, of course, in order to make the foot surface more flat, it is necessary to insert an insole of cardboard or plastic inside the foot.


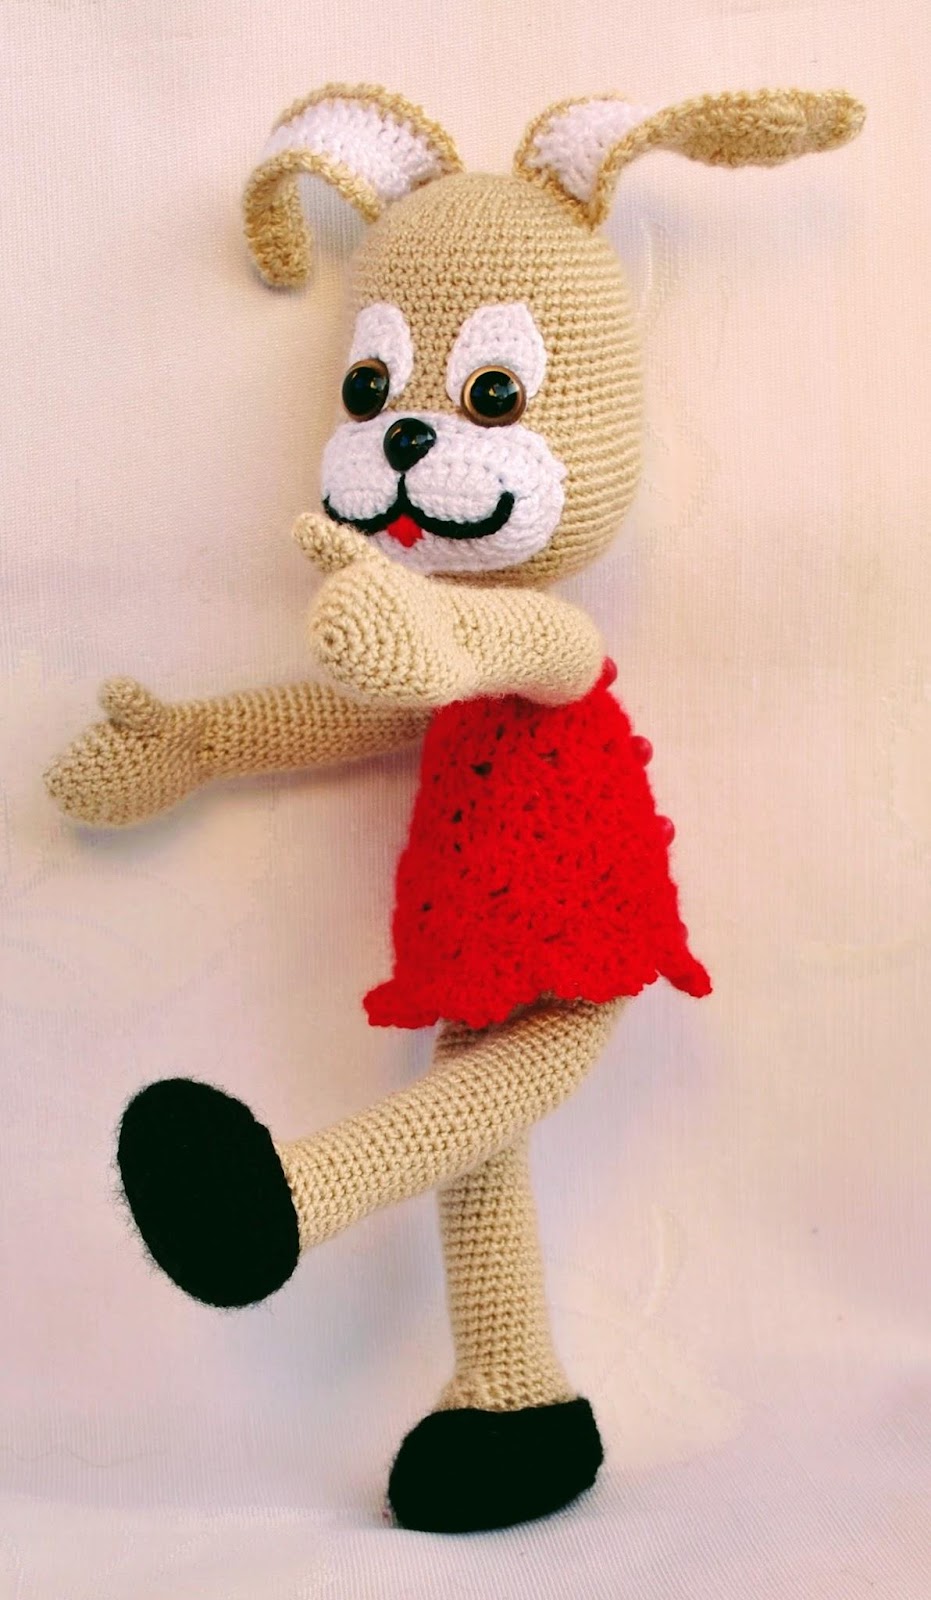
My Mom Hare has such insole inside her foot.


DSC_0159.JPG


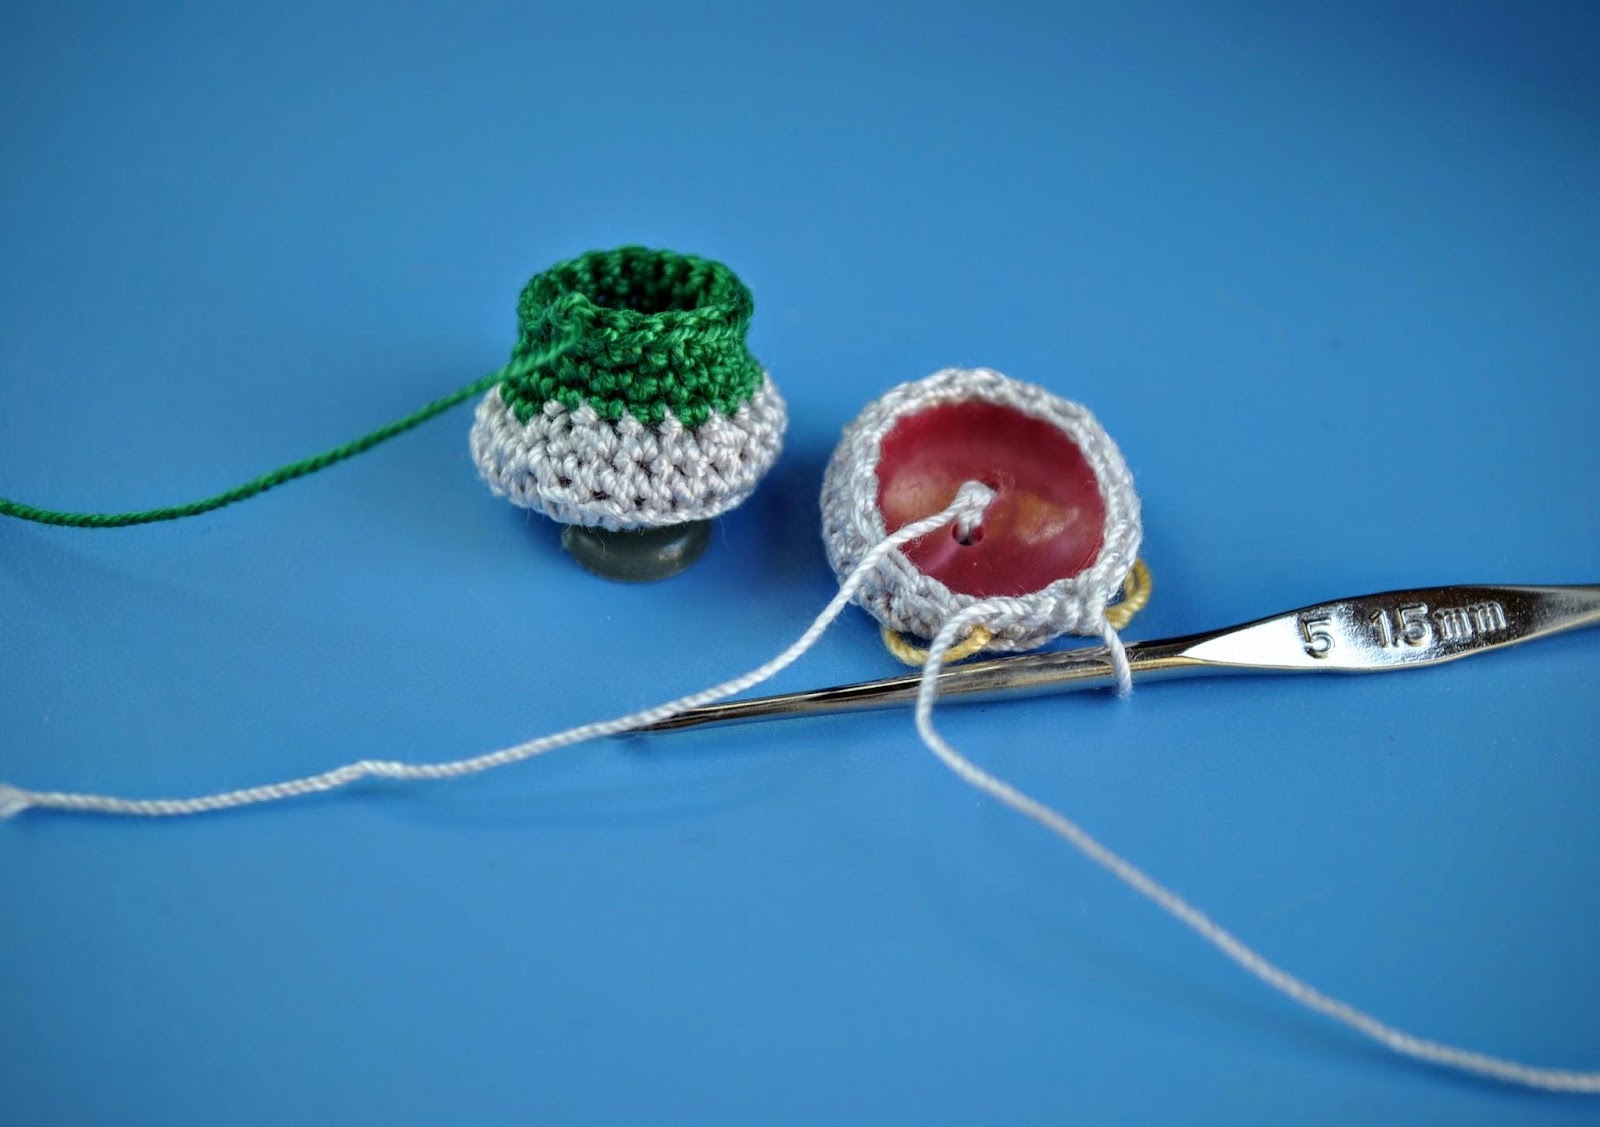
If the doll has rounded paws, then I just use plastic buttons. Fortunately, my grandmother left them to me in huge number.


DSC_0375.JPG


So, you crochet a doll's foot, then choose a fit button (of course, you can take a piece of dense plastic) and just sew it inside the foot (you can make holes in plastic using a hot needle). Then you make a leg and fill it as usual. The best side of this method is that you can even wash such toys, your doll's legs will remain the same good.

Welcome to my Ravelry store. Here you will find many interesting patterns that include detailed instructions.


Wednesday, September 27, 2017

Tutorial: Wire frame for your amigurumi toy/doll

I like to make amigurumi with a skeleton inside.
Of course, for children under 10-12 years (depending on their temperament) it is better not to give such toy into their hands (or at least not to leave them alone with it).
But if you want to make a gift for a teenager or your friend, there is nothing more amusing than a doll, that can be given any pose. This doll is much more interesting than soft toy standing on the shelf and leaning on the wall.


DSC_0355.JPG


My favorite wired toy is my frog. He will be an example for this small tutorial on making a simple frame for amigurumi.


1. Make measuring:
- the distance between the fingers along both hands - L(arms) (for my Frog it’s 16 cm)
- the length of the Body together with the Legs and the Feet - L(body) (14 cm)
лягущка с каркасом.jpg


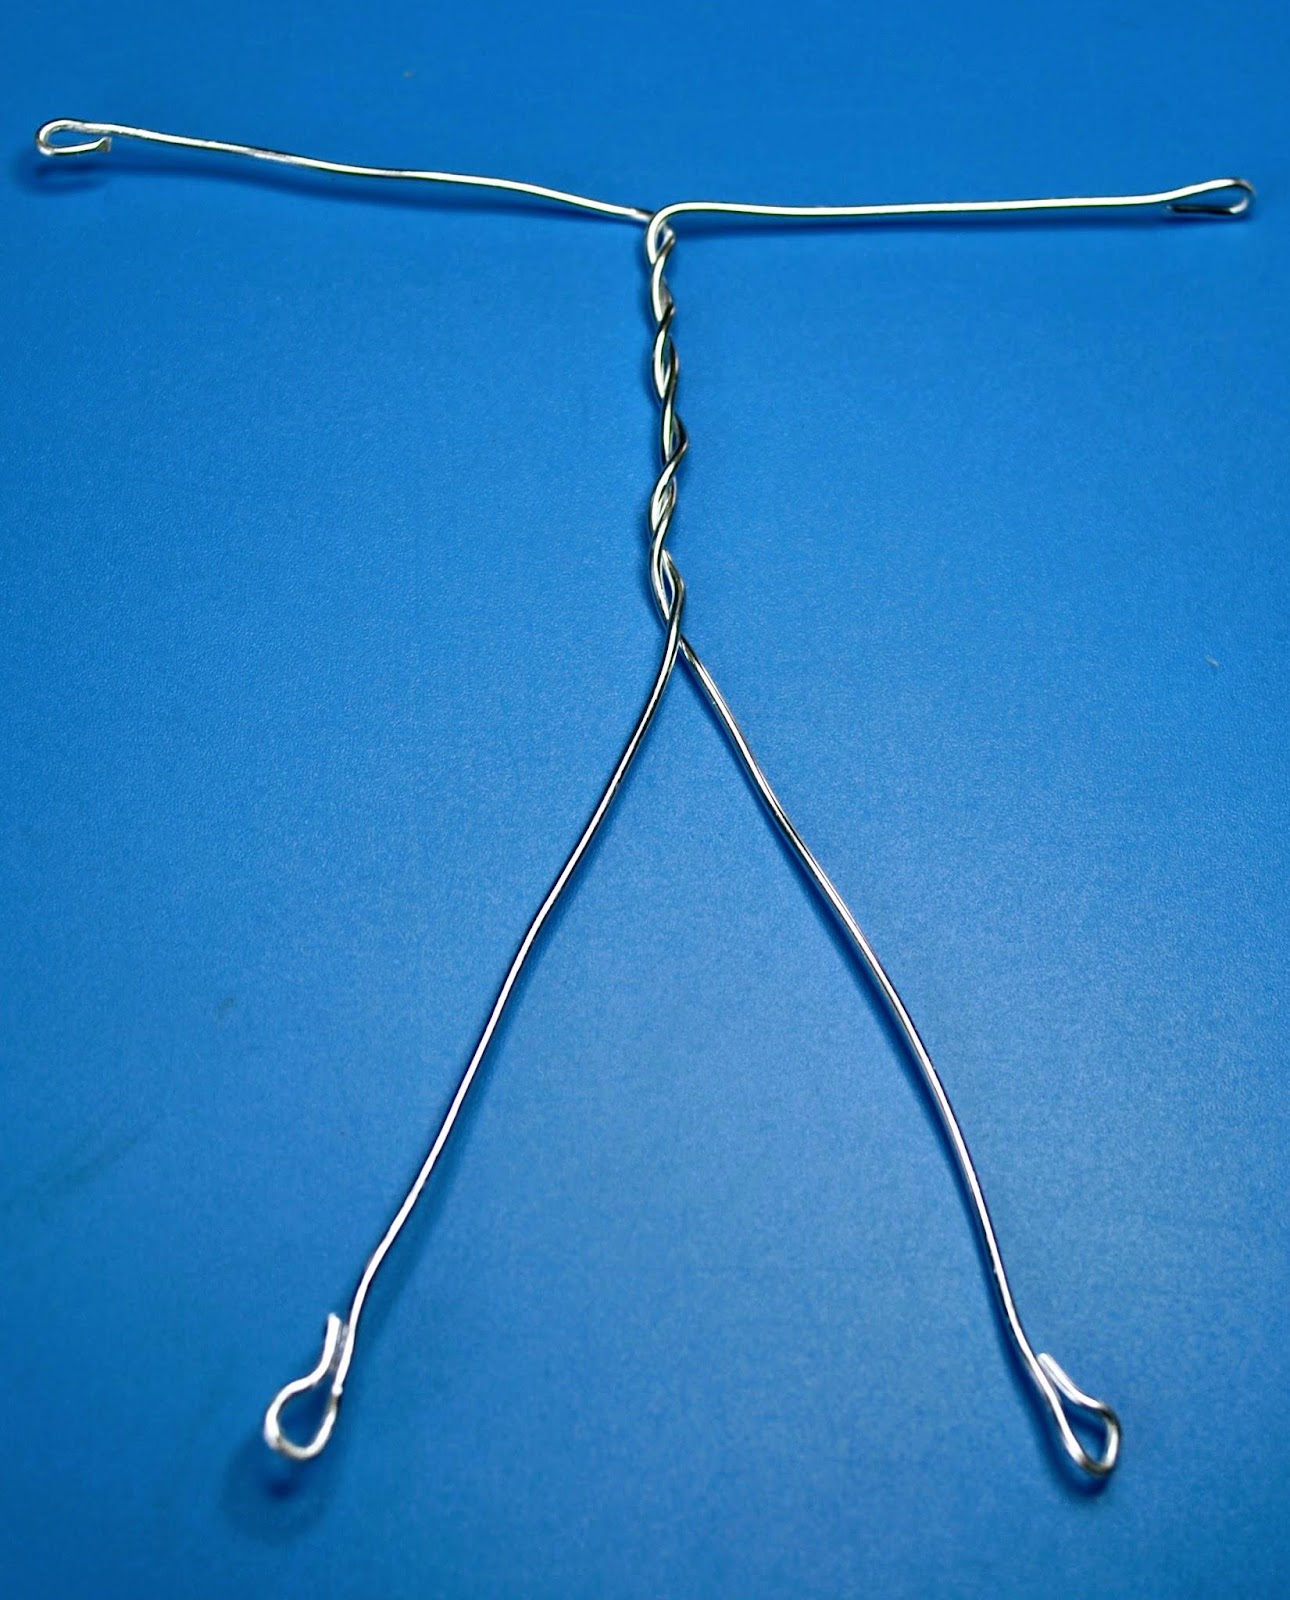
2. Cut  2 pieces of aluminium wire, the length of each one:  ½ L(arms) + L(body) + 0.5 cm   (= 8+14+0.5= 22.5cm)


3. Make a ring at each end of the wire.


DSC_0604.JPG


4. Measure off ½ L (arms) - 1 cm along each piece   and bend the wire 90 degrees.


5. Twist together the wire pieces as shown on the photo.


6. Try on the skeleton to the Body. If it necessary, remove an excess of the wire.


DSC_0611.JPG


7. Put the skeleton inside the Body. The bend at the ends of the wire must get inside the Paws.


8. Fill the Body around the skeleton firmly, especially the bottom part.


This skeleton is very simple. More difficult option with a head part see in my pattern The Hare Family.
My Ravelry Store

Tuesday, September 26, 2017

My Pudgy Toys

Once, when I just started my toys creation, I needed a body for my elephant doll. I wished him to be a cute, pudgy baby elephant with a big head and huge ears. Like this one


Among a lot of free patterns I did not find a fit option. I only saw a toy with such belly as I imagined. Instead buying the pattern I decided to "turn on my own brain" (as my husband says).
After a couple of days of insistent experiments I got the wished result.


IMG_20151001_115012.jpg


And the real secret of such nice belly is that you need to make a few increases above the joining of legs. Only after that you have to make increases along the body.


I just have fell in love with this type of a body. I make pudgy little piggies, hippos, hedgehogs, dragons and even the Santa Claus.

You can find the detailed pattern in any of these my patterns:


общее фото.jpg

Saturday, September 23, 2017

A small tutorial on sewing amigurumi details

I know that many crocheters (especially beginners) don't like sewing of crocheted details. I have to admit I too really disliked this work at first. Then, in time, I learned some sewing seams, and this process has ceased to be so exhausting for me.
 Now I often include this small tutorials on sewing in my patterns for sale.
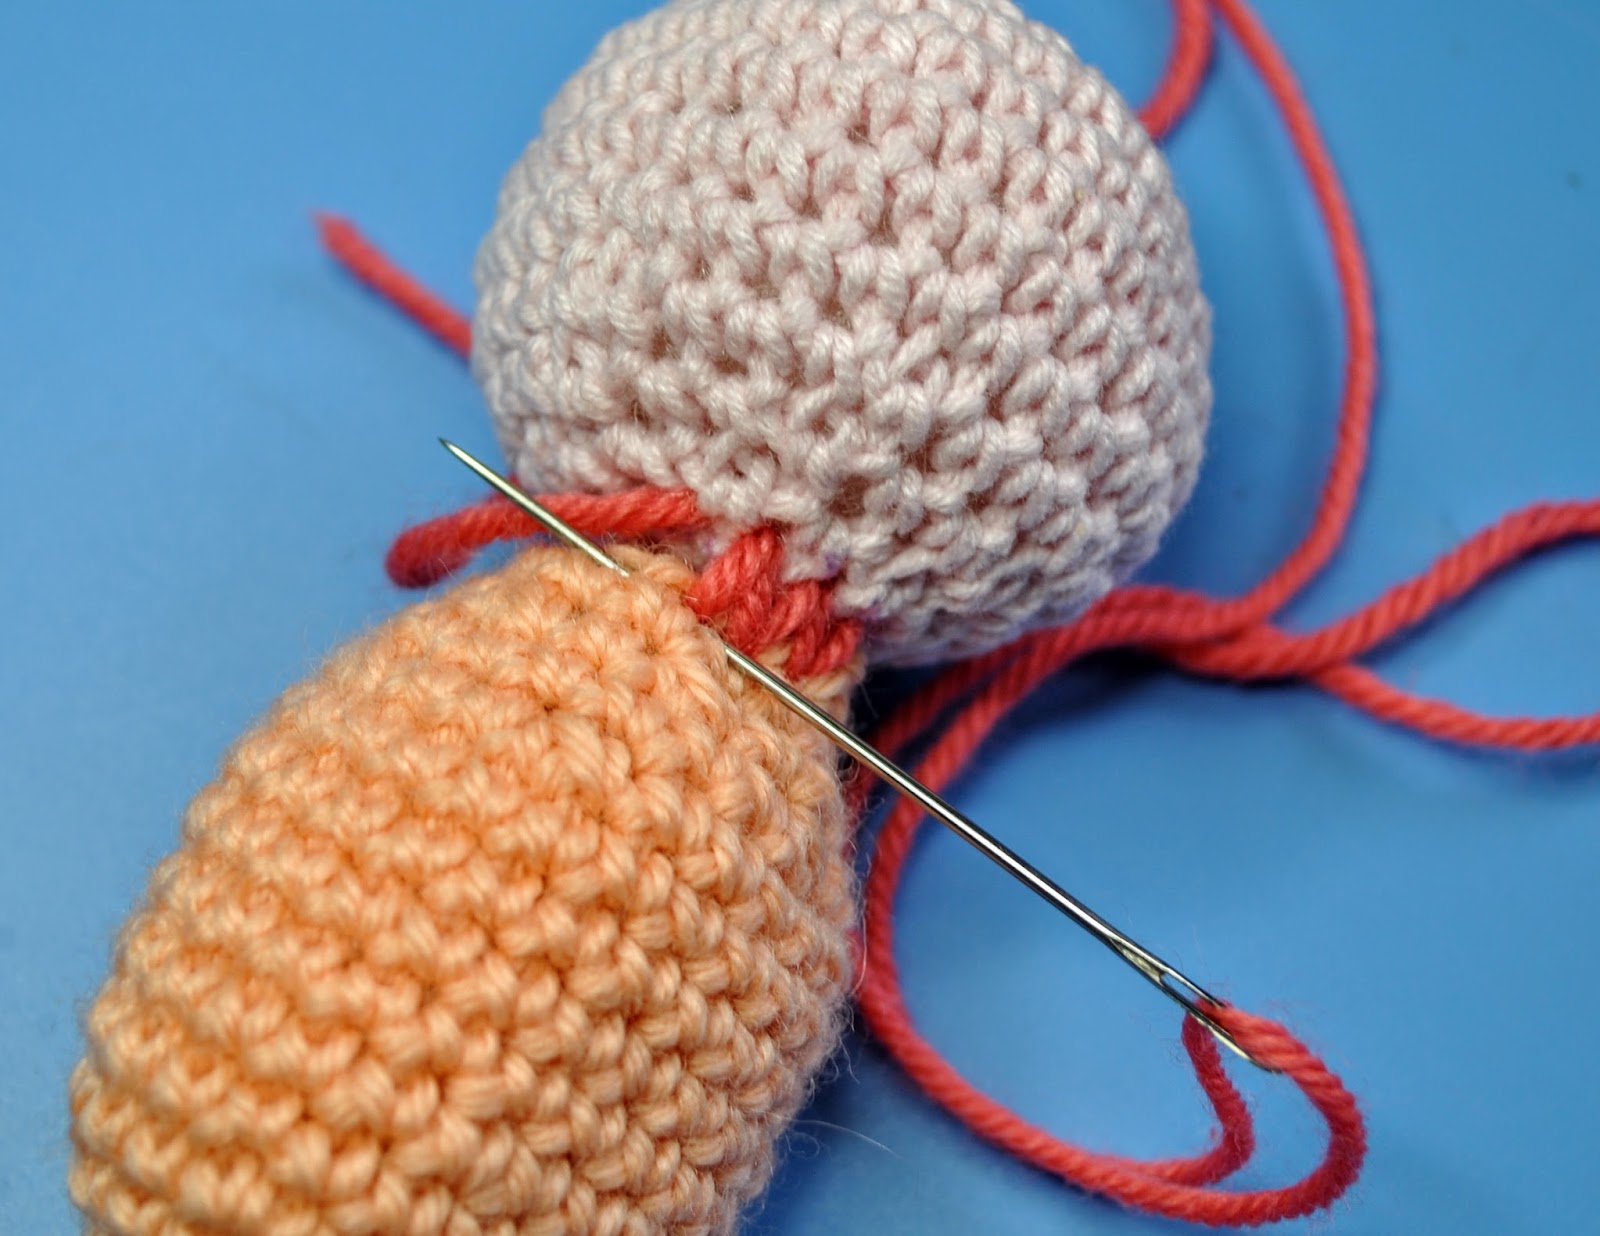
Today I want to share one of my ways to sew amigurumi details. This method is great for sewing the head to the body, for example.

1. Begin from a sewing stitch on the body. Get out your thread from inside to front side. Make a sewing stitch behind the vertical loops of the head's opposite stitch.


DSC_0474.JPG

2. Come back into the same stitch of the body. Pass your needle behind the vertical loops of the stitch, get it out into the next stitch.

DSC_0470.JPG

3. Repeat steps 1, 2. Sew each stitch twice!

DSC_0477.JPG

This method fit for sewing details as with opened finishing holes and as well with closed holes.

DSC_0338.JPG

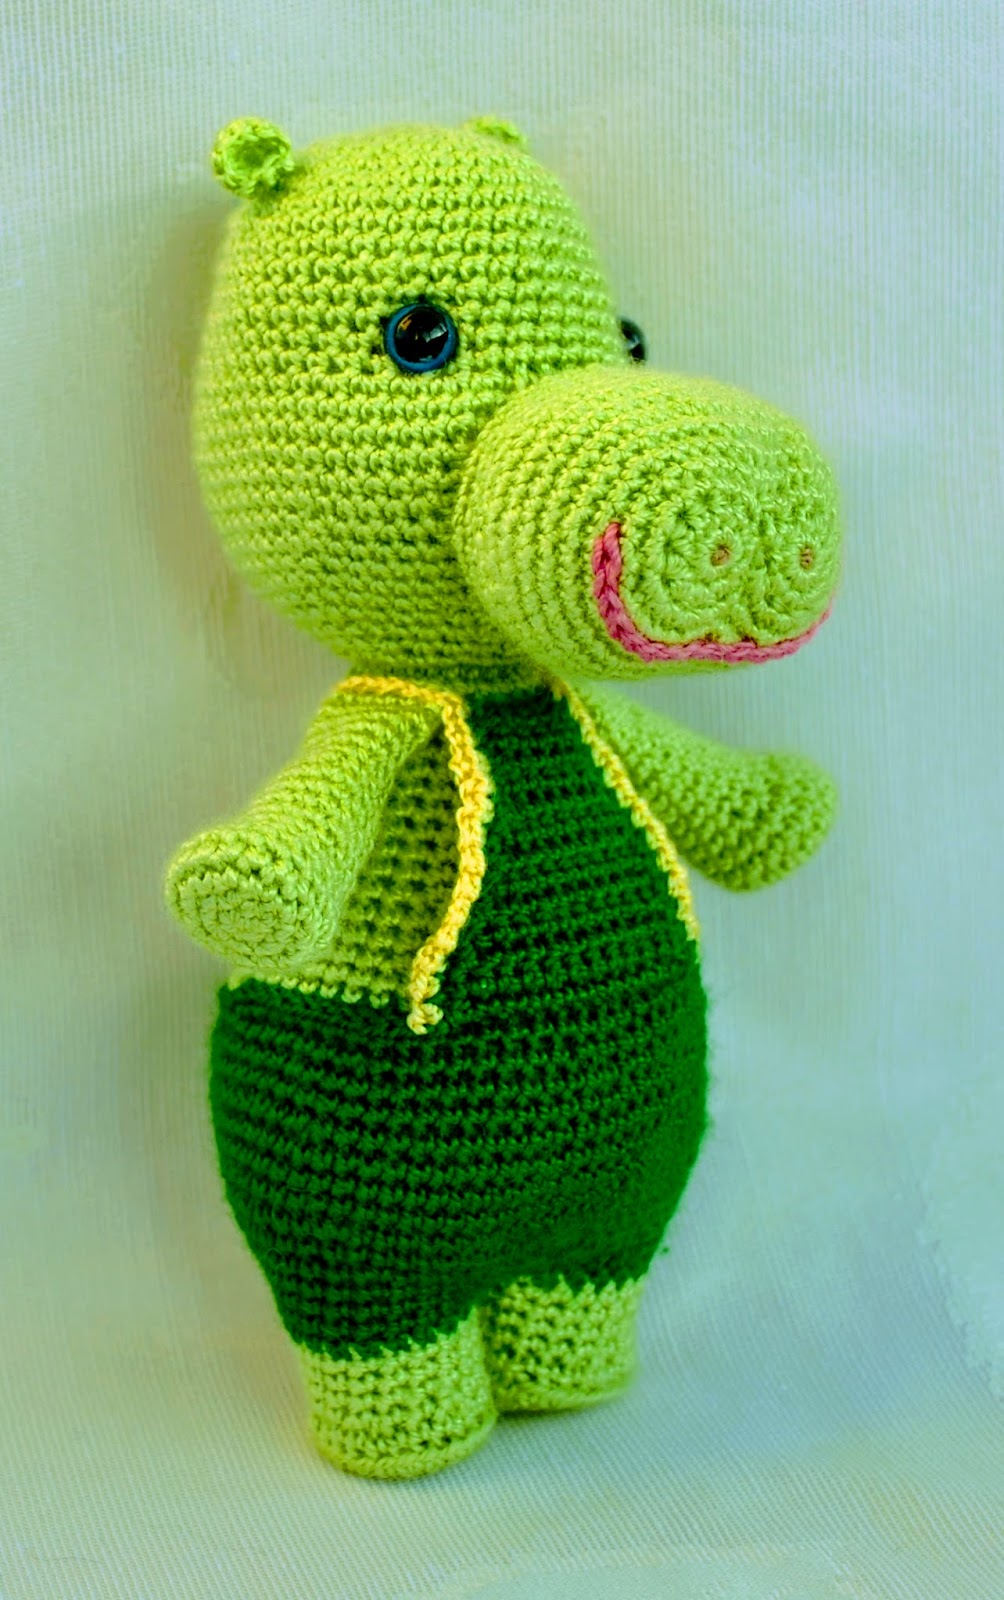
The Hippo's Snout is sewed the same way, but this case your needle have to pass  through the nearest stitch of the Head.

Try this method, it's so easy! Happy stitches to you!