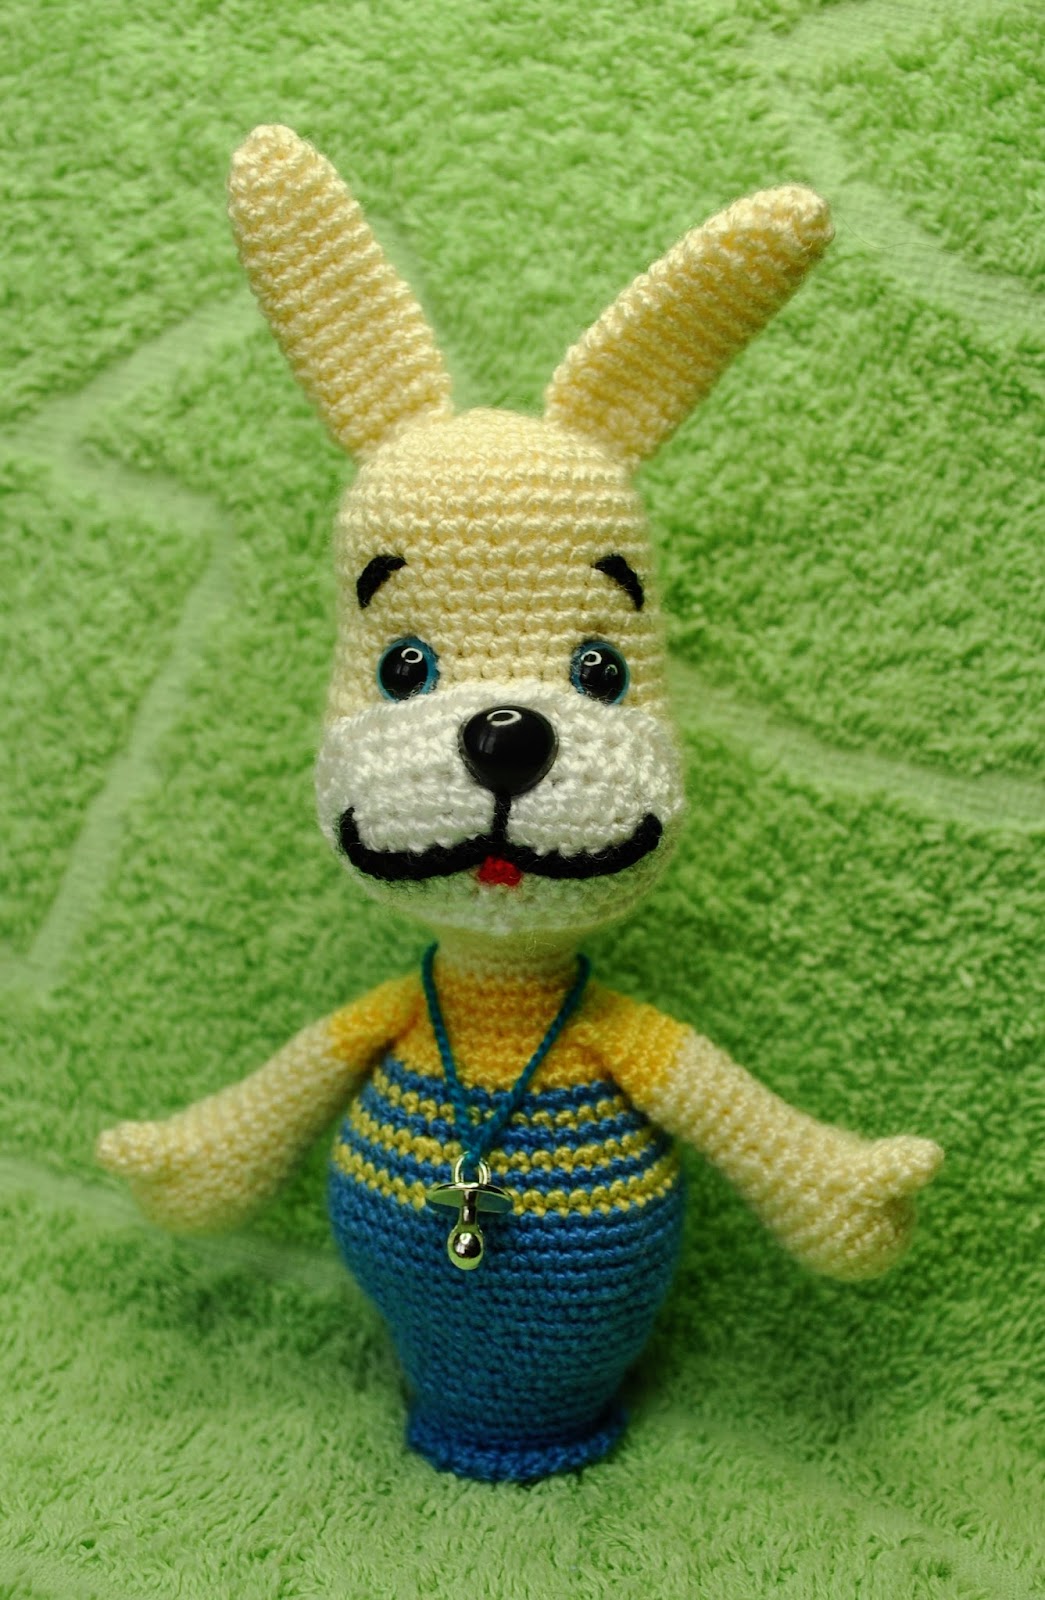
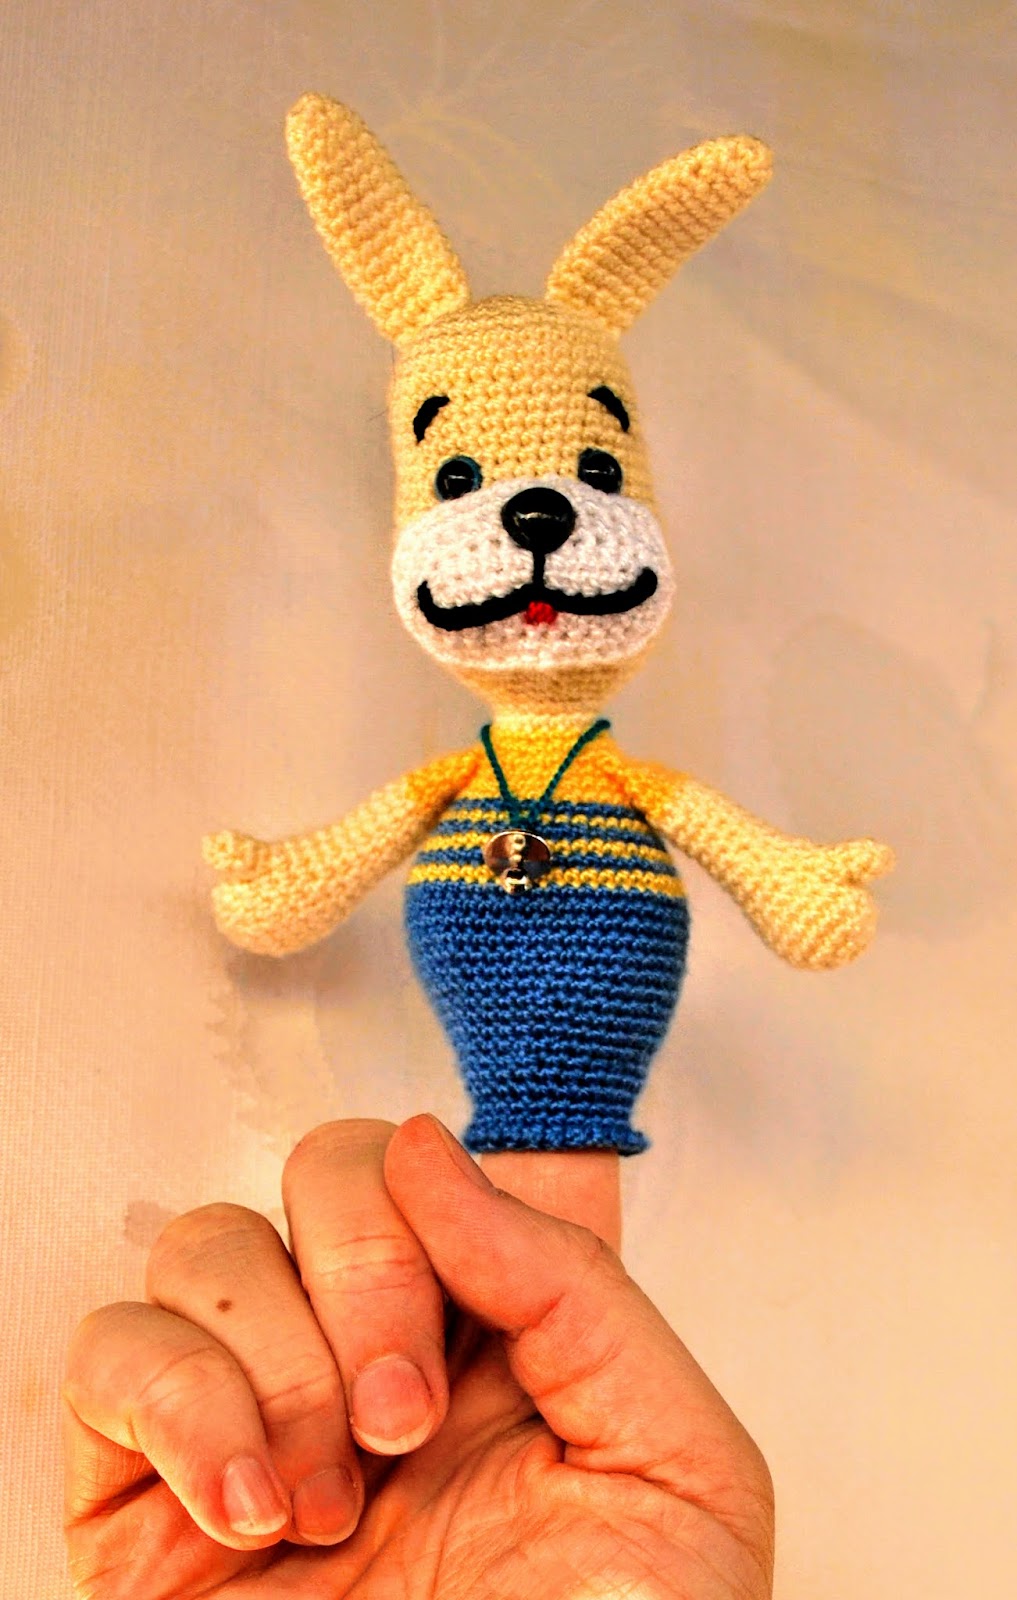
Hi! Today i introduce my last and beloved creation. It’s a finger puppet of 12 cm tall.
Toy is made of acrylic yarn (30 gram = 150 m). It took me: about 10 g cream color yarn for head, arms and ears; about 5 g - blue and yellow for body; a little bit black and red for embroidery of Hare’s snout. I worked with hook 1.75 mm, used polyester filler and batting.


You can read pattern here
or go to the pattern page on Ravelry
or download its PDF file from Ravelry with one click
or go to the pattern page on Ravelry
or download its PDF file from Ravelry with one click
Abbreviations
(US terminology)
ch - chain(s), chain stitch
sl st - slip stitch
sc - single crochet
hdc - half double crochet
dc - double crochet
inc - increase (mostly 2 sc in 1 stitch of working row)
dec - decrease (2 stitches of a working row crocheted together)
sk st - skip a stitch
inc ‘hdc’ - 2 hdc in 1 stitch of a working row
inc ’dc’ - 2 dc in 1 stitch of a working row
It’s important:
The pattern is worked in continuous rounds, which means you DO NOT join to the beginning of a row with a slip stitch, but directly work the first stitch of the next row into the first stitch of the previous row.
I recommend to mark the beginning of each round with a piece of colour thread. In the pattern this marks are often used to join parts, so don’t remove them immediately after finishing the part.
Crocheting sequence:
First of all we make 2 arms (thumb > hand >arm). Toy’s head, neck and body are crocheted from top to bottom as a whole detail, the arms are attached in the process.
At finish of the body we make an inner detail ‘Thimble’ and join them together.
For decorating the Head we make ears and a white snout.
Hand + Arm, 2 pieces
First make thumbs
Thumb
with basic yarn
- 4 sc in mr
- inc, 3 sc (5)
- 5 sc, sl st
Cut, fasten off the thread
Hand
with basic yarn
Round 1: 6 sc in magic ring
Round 2: [inc] around (12)
Round 3: [sc, inc] around (18)
Round 4: sc around (18)
Round 5: sc, apply the thumb, join it with 2 sc, 15 sc (18)
Round 6: sc, 3 sc on the stitches on the thumb, 15 sc (19)
Round 7: sc, [dec, 2 sc] *4, dec (14)
Stuff the hand
Round 8: 14 sc
Round 9: 2 sc, dec, 5 sc, dec, 3 sc (12)
Round 10: 4 sc, dec, 6 sc (11)
Rounds 11-14 (4 rounds altogether): sc around (11)
Round 15: 8 sc with basic yarn, change yarn to yellow (or any colour of T-shirt), 3 sc
Rounds 16-18 (3 rounds altogether): sc around (11)
stuff the arm a little, don’t stuff the top part of the arm
Round 19: 4 sc, flatten the arm and join together the opposite stitches with 5 sc.
Cut the thread, fasten off
Head
Round 1. 6 sc in magic ring
2. 6 inc (12)
3. [sc, inc] around (18)
4. [inc, 2 sc] around (24)
5. [sc, inc] around (36)
6-13 (8 rounds altogether): sc around (36)
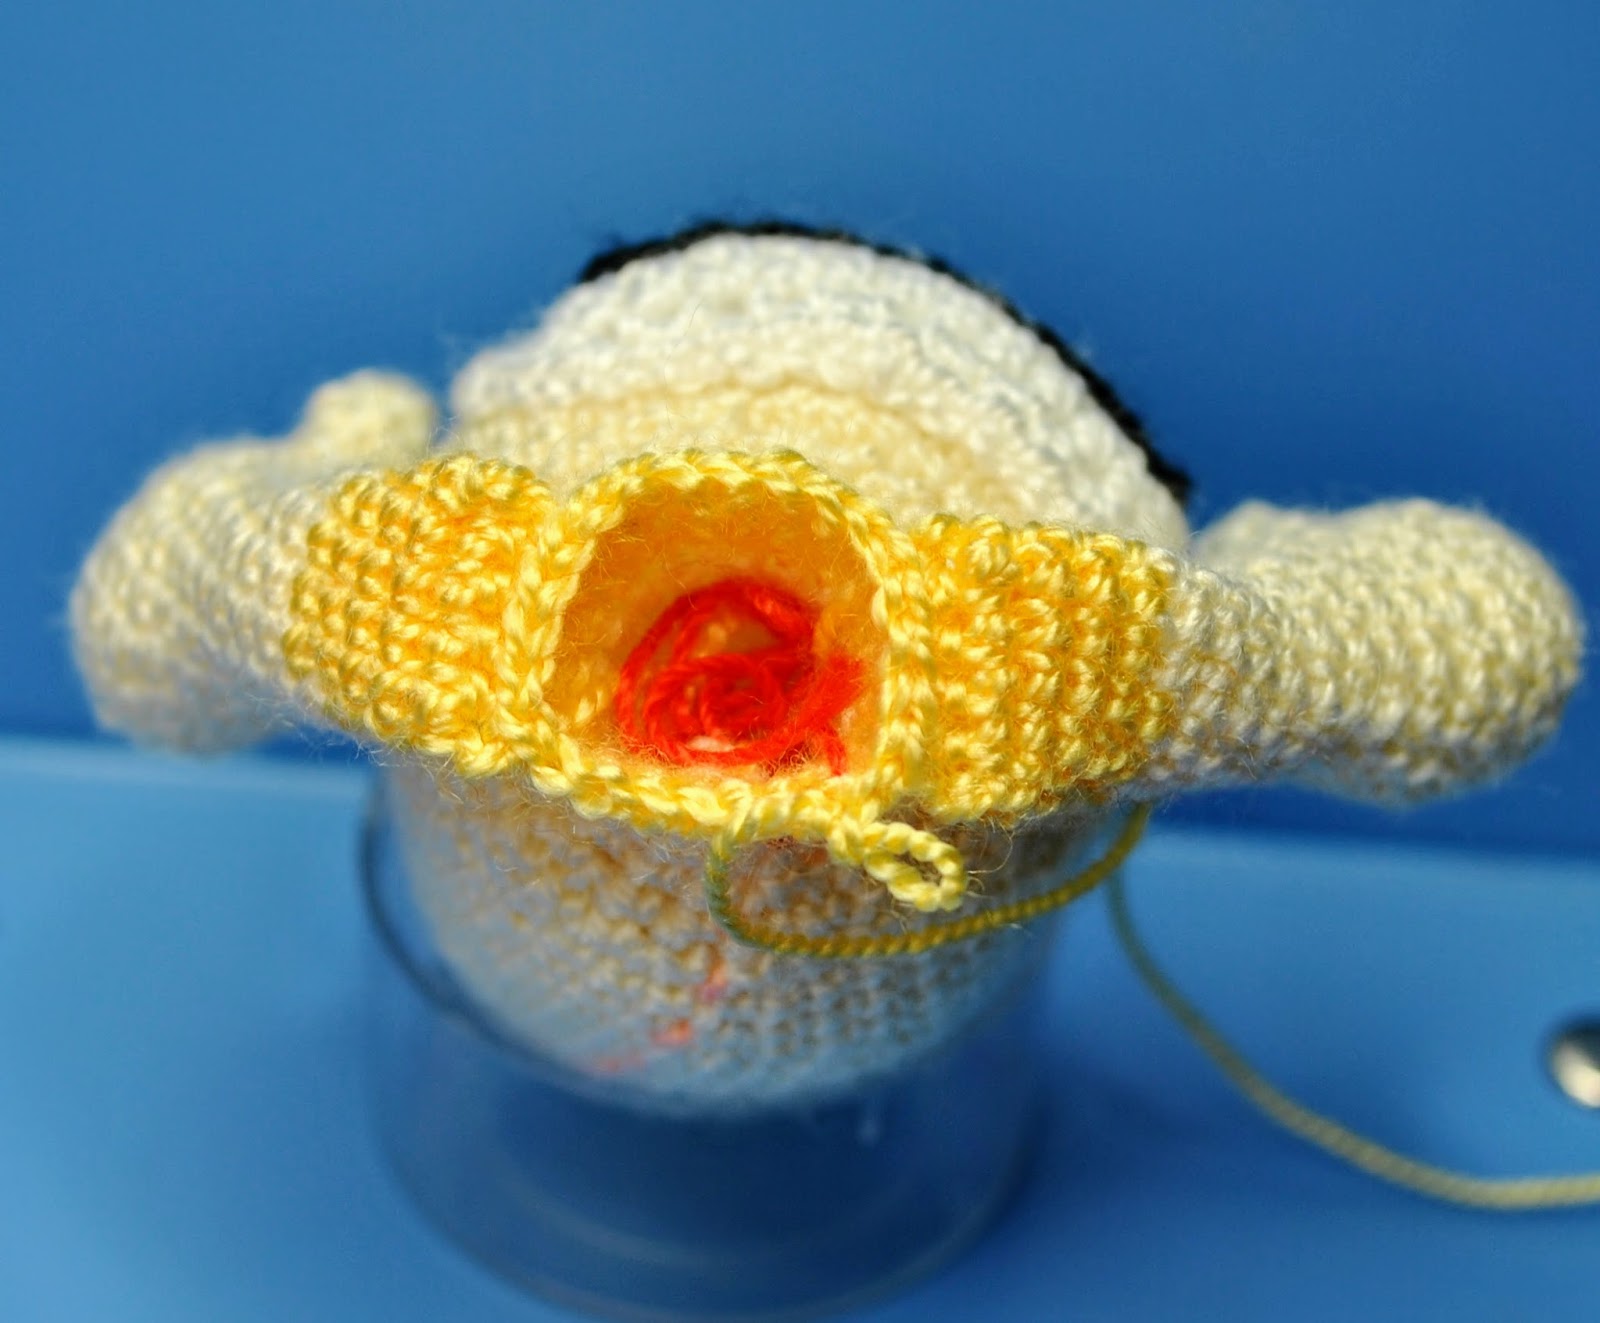
in the next round you can make holes for safety eyes (else make: sc around)
14. 14 sc, sk st+2 ch, 6 sc, sk st+2 ch, 14 sc (36)
15. sc around (36)
16. 10 sc, 6 inc, 5 sc, 6 inc, 9 sc (48)
17-20 (4 rounds altogether): sc around (48)

Photo 2: Installation safety eyes
21. [6 sc, dec] around (42)
22. sc around (42)
23. [5 sc, dec] around (36)
24. sc around (36)
25. [4 sc, dec] around (30)
26. [3 sc, dec] around (24)
stuff the head
27. [2 sc, dec] around (18)
28-29 (2 rounds altogether): sc around (18)
Body
at the backside of the toy change basic yarn to colour of the T-shirt (yellow)
30. sc around (18)
31: [2 sc, inc] around (24)
32 (attaching the arms): 7 sc, apply the arm ‘thumb forward’, join it with 5 sc, 7 sc, apply the 2nd arm, join it with 5 sc (24)
Photo 3: Attaching the arms
33: sc around (24)
34: [3 sc, inc] around (30)
35: sc around (30)
36: [4 sc, inc] around (36)
37: sc around (36)
38: [5 sc, inc] around (42)
39: [6 sc, inc] around (48)
40: sc around (48)
41: [7 sc, inc] around (54)
change yarn to blue (pants)
42: sc around (54)
43-45 (3 rounds altogether): sc around (54)
46: [7 sc, dec] around (48)
47: [6 sc, dec] around (42)
48. sc around (42)
49: [5 sc, dec] around (36)
50-51 (2 rounds altogether): sc around (36)
52: [4 sc, dec] around (30)
53: [3 sc, dec] around (24)
54: sc around (24)
Don’t cut off the yarn, we will finish after making the thimble. It’s inserted inside of the body.
Thimble
Make with yarn any colour
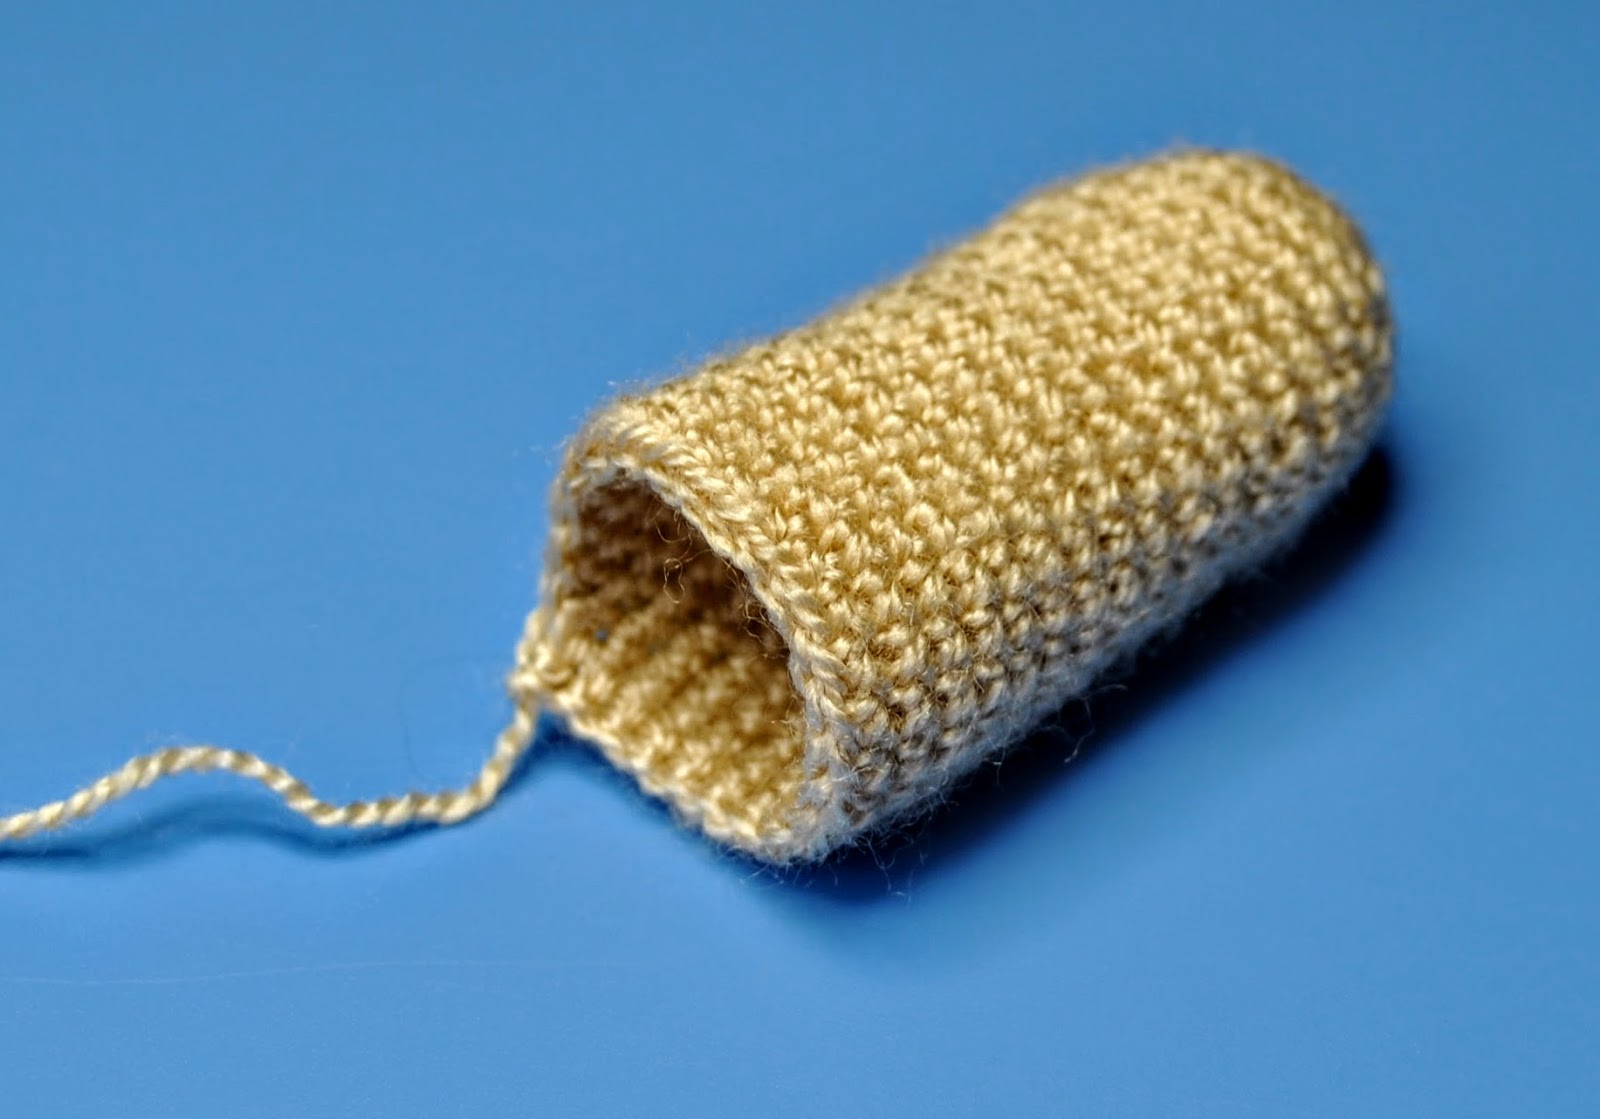
Photo 4a: The thimble
Round 1: 6 sc in magic ring
2: [inc] around (12)
3. [ sc, inc] around (18)
4: sc around (18)
5: [ 2 sc, inc] around (24)
6: sc around (24)
and so on for length of 4 cm, try it on to the toy’s body and your forefinger.
Joining the body and the thimble
Stuff the body, insert the thimble inside, continue crocheting the body, joining together the opposite stitches of both details.

Photo 4b : Joining the thimble and the body
23: sc around (24)
Make as you wish 3-5 sc-rounds
Make in the last round: [sc, ch] around
Cut, fasten off
Ears, 2 pieces
with basic yarn
- 6 sc in mr
- [sc, inc] around (9)
- 9 sc
- [2 sc, inc] around (12)
5 - 13 (9 rounds altogether) : sc around (12)
14. [2 sc, dec] around (9)
flatten the ear, join together the opposite stitches with 4 sc
White Snout
11 ch
- in the 2nd st.: 9 hdc, 3 hdc in the last st., 8 hdc, inc ‘hdc’, sl st in the 1st st., ch
- inc ‘hdc’, 8 hdc, [inc ‘hdc’]*3, 8 hdc, [ inc ‘hdc’]*2, sl st. in the 1st st.,
- [ch, sc] in each st. of the 2nd round, sl st.
Cut the thread, leave a long tail for sewing
Embroider the Snout, install a nose. Put under the Snout piece of polyester batting
Attach the Snout to the Head, placing the nose exactly between the eyes.
Embroider eyebrows, which would give to the Hare’s face a funny expression.
Instead the Hare’s tail make white chain (5-7 st.) and sew it on the back.
No comments:
Post a Comment