Crochet pattern by Nadezhda Bianova
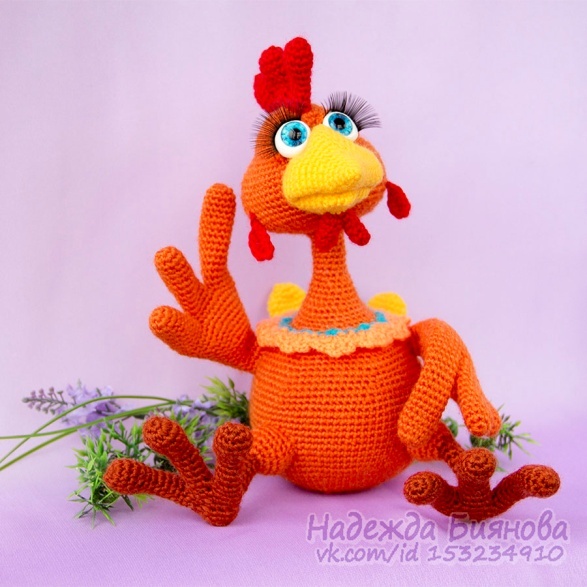
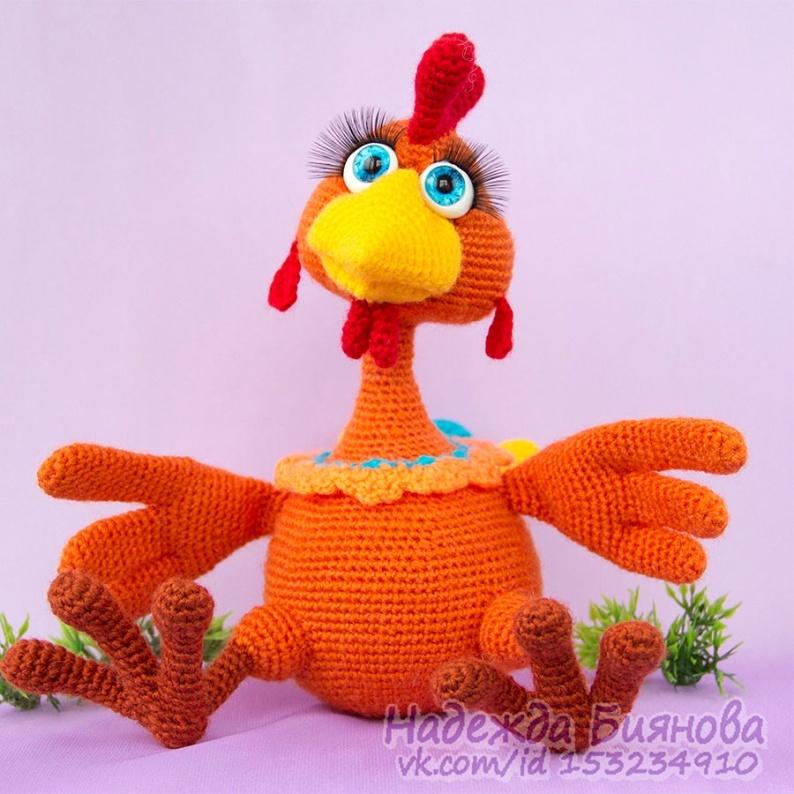
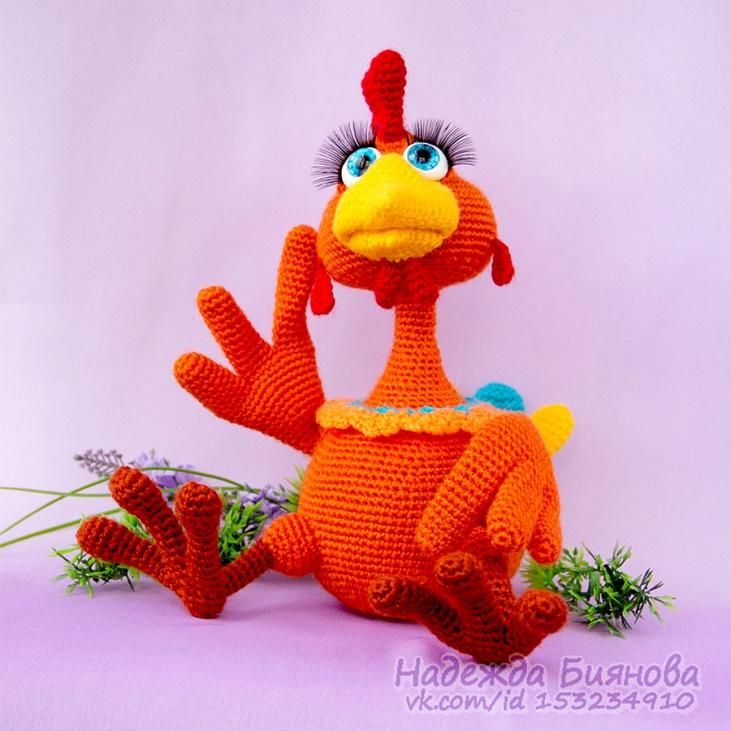
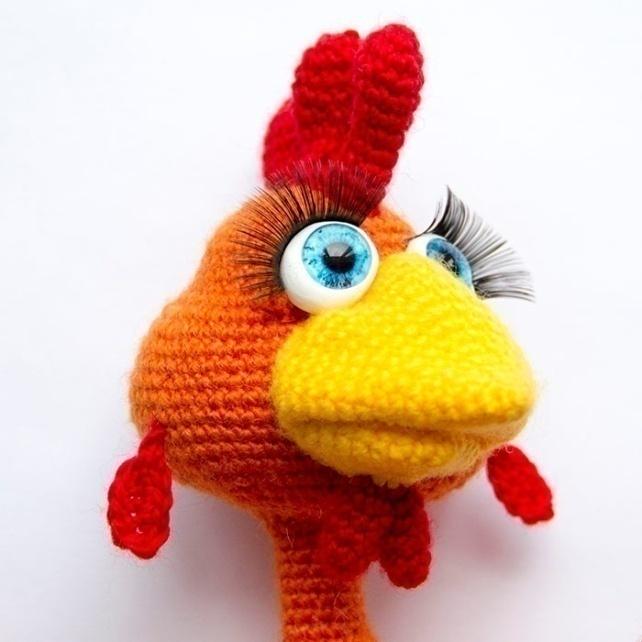
Chicken Mania

This toy is an author's design. This pattern is for your personal use only. Forwarding, copying and distribution on other sites, as well as in print media are prohibited. You can dispose of your finished toy at your discretion, when publishing your creations you need to specify the name of the pattern author and an active link to my store: http://www.livemaster.ru/bianova
I hope for your understanding.
- The translation into English was done by Ella Kovalyova (with the kind permission of the author) for a fb group “Help with Russian pattern”. The same rules apply to this translation.

Materials :
- Yarn acrylic 300-400m/100g
- main color (orange) - about 50g
- yellow - about 8-10g
- brown and red - a little
- white 400-500 m/100g - a little
- Crochet hook - 1.5 mm
- Filler of your choice
- Couper (or aluminium) wire (d=0.9-1.1 mm) about 120cm
- Scotch tape for isolation joints of the wire frame
- Plastic eyes d=10мм, also you can use Oven Bake Clay for a white of the eye
- Artificial eye lashes
Abbreviations and terms:
- sc – single crochet
- ch – chain/s
- inc - increase, make 2 sc in 1 stitch of the previous row
- dec – decrease, crochet 2 next sc together
- +1 - displacing stitch (at the end of round: make one more stitch in the 1st stitch of the next round, displace your stitch marker to left, the 2nd stitch of the next round became the 1st stitch)
- sl st – slip stitch
- FLO - work in front loops only
- BLO - work in back loops only
The difficulty level is medium. Crochet all parts in spiral rows. It's recommended to use a stitch marker or a contrasting thread to mark the rounds.
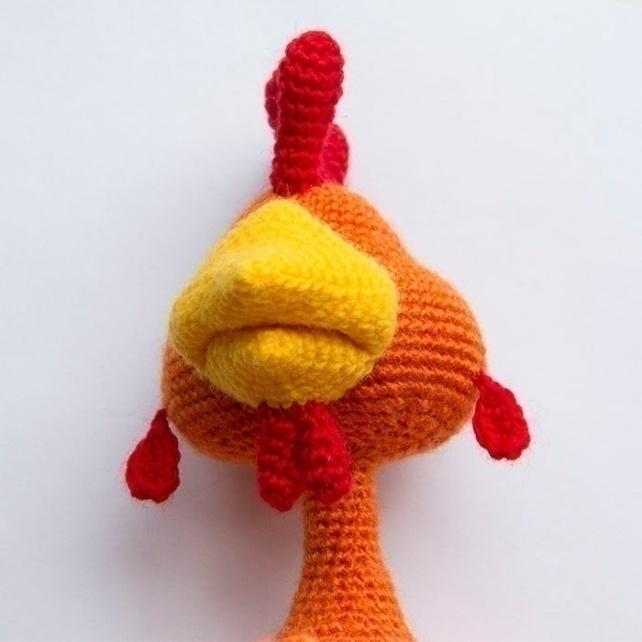
When using these materials, the toy is 21 cm high (in a sitting position, including a chicken comb).
Head
main (body) color
1 round 6 sc in a magic ring
2 round 6 increases = 12
З round (1 sc, inc)*6 times = 18
4 round (2 sc, inc)*6 times = 24
5 round (3 sc, inc)*6 times = 30
6 round (4 sc, inc)*6 times = 36
7-11(5) rounds 36 sc
12 round (inc, 1 sc)*3 times, 6 inc, 12 sc, 6 inc, (1 sc, inc)*3 times = 54
13 round 9 sc, (1 sc, inc)*6 times, 12 sc, (inc, 1 sc)*6 times, 9 sc = 66
14-20(7) rounds 66 sc
21 round 66+1
22 round (dec, 1 sc)*3 times, 48 sc, (1 sc, dec)*3 times = 60
23 round 6 sc, (1 sc, dec)*6 times, 12 sc, (dec, 1 sc)*6 times, 6 sc = 48
24 round 6 sc, 6 dec, 12 sc, 6 dec, 6 sc = 36
25 round (4 sc, dec)*6 times = 30
26 round (3 sc, dec)*6 times = 24
27 round (2 sc, dec)*6 times = 18
28 round 18 sc
Cut the yarn, fasten off. Stuff well.

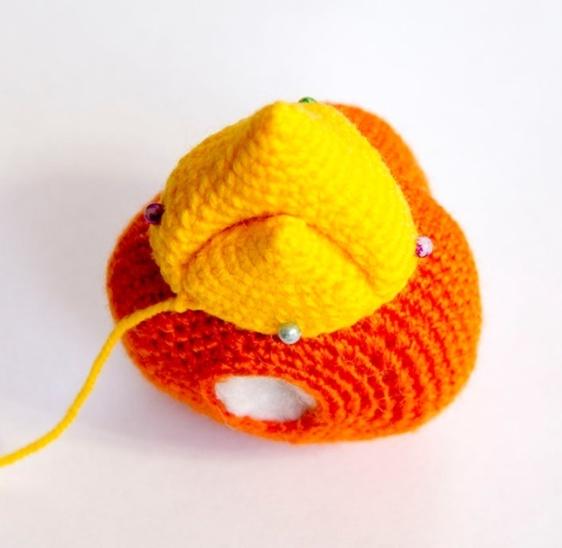
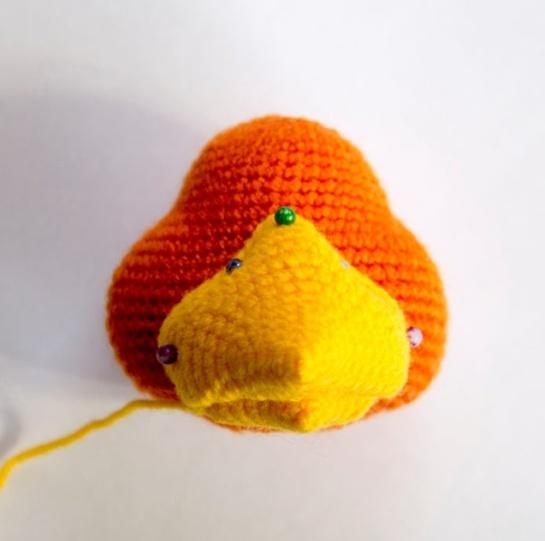
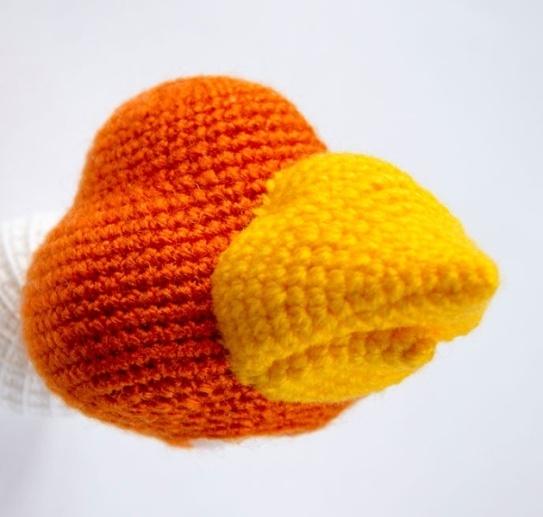
Beak yellow yarn
Beak ( top part)
1 round 3 sc in a magic ring
2 round З increases = 6 sc
3 round (1 sc, inc)* 3 times = 9
4 round (2 sc, inc)* 3 times = 12
5 round (3 sc, inc)* 3 times = 15
6 round (4 sc, inc)* 3 times = 18
7 round (5 sc, inc)* 3 times = 21
8 round (6 sc, inc)* 3 times = 24
9 round (3 sc, inc)* 6 times = 30
10 round (4 sc, inc)* 6 times = 36
11 round (5 sc, inc)* 6 times = 42
12-14(3) rounds 42 sc
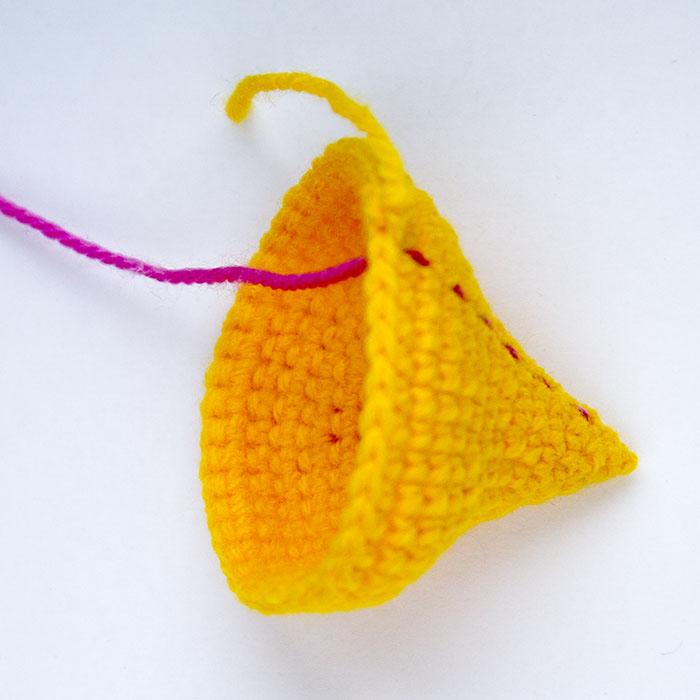
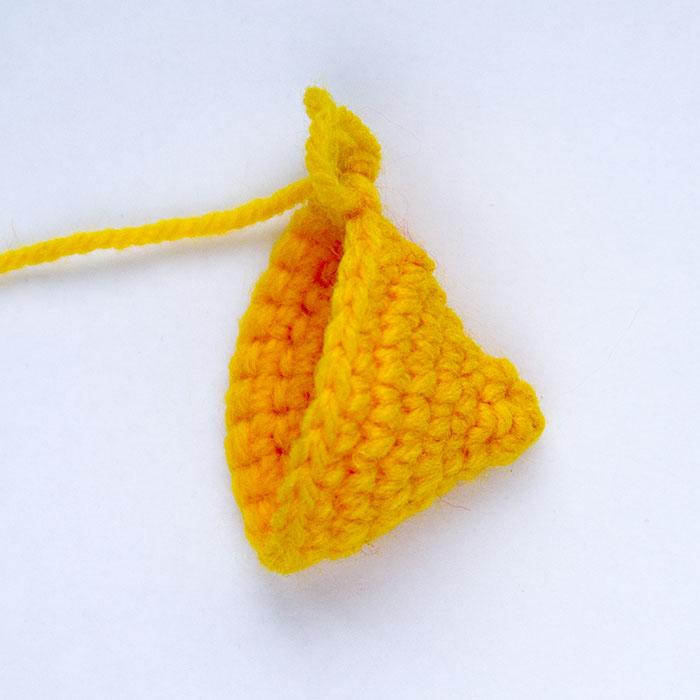
Beak (lower part)
1 round 3 sc in a magic ring
2 round З increases = 6
З round (1 sc, inc)* 3 times = 9
4 round (2 sc, inc)* 3 times = 12
5 round (1 sc, inc)* 6 times = 18
6 round (2 sc, inc)* 6 times = 24
7-8 round 24 sc, don’t cut the yarn
Put together both beak parts, join them with 14 sc through the opposite stitches. Then make 38 sc around, in the free stitches of both parts.
Cut the yarn, leaving a long tail for sewing.
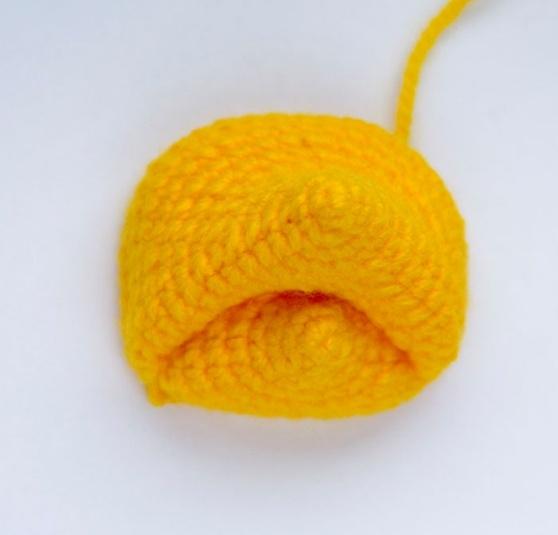
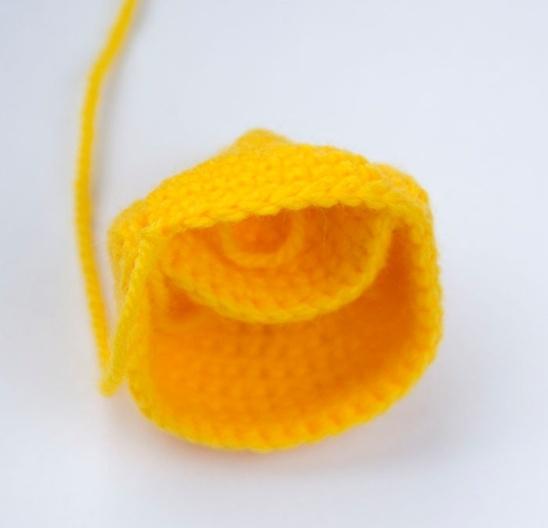
Make a crease on the nose bridge, attach with pins to the head. Place the beak on the flatter side of the head, can be lightly stuffed to save the shape.

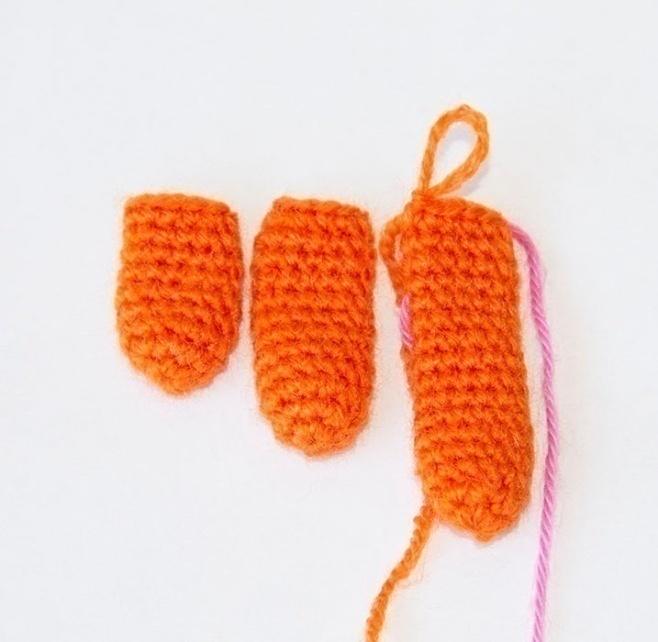
Wings
Short feather (2 pcs)
1 round 6 sc in a magic ring
2 round 6 inc = 12
3-9(7) rounds 12 sc, cut the yarn, fasten off.
Middle feather (2 pcs)
1 round 6 sc in a magic ring
2 round 6 inc = 12
3-12(9) rounds 12 sc, cut the yarn, fasten off
Long feather (2 pcs)
1 round 6 sc in a magic ring
2 round 6 increases = 12
3-6(4) rounds 12 sc, don’t cut the yarn, don’t remove the stitch marker.
17 round attaching the middle feather: make 6 sc along the long feather, 12 sc along the middle one, 6 sc along the long one = 24
18 round attaching the short feather: 12 sc, 12 sc along the short feather, 12 sc = 36
19 round (7 sc, dec)* 4 times = 32
20 round 32 sc + 2
21 round (6 sc, dec)* 4 times = 28
22 round 28 sc
23 round (5 sc, dec)* 4 times = 24
24 round 24 sc
25 round (4 sc, dec)* 4 times = 20
26 round 20 sc
27 round (3 sc, dec)* 4 times = 16
28 round 16 sc
29 round (2 sc, dec)* 4 times = 12
30-32(3) rounds 12 sc
Cut the yarn, leaving a long tail for sewing.
Insert the wire in the long feather.

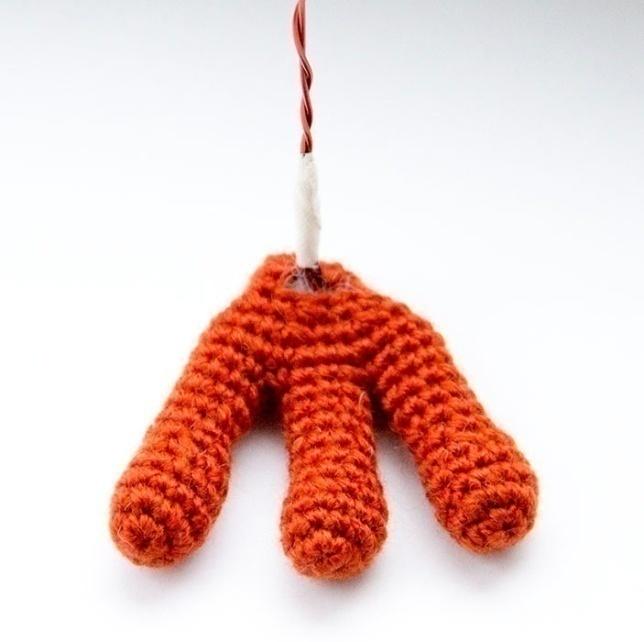
Legs
brown yarn
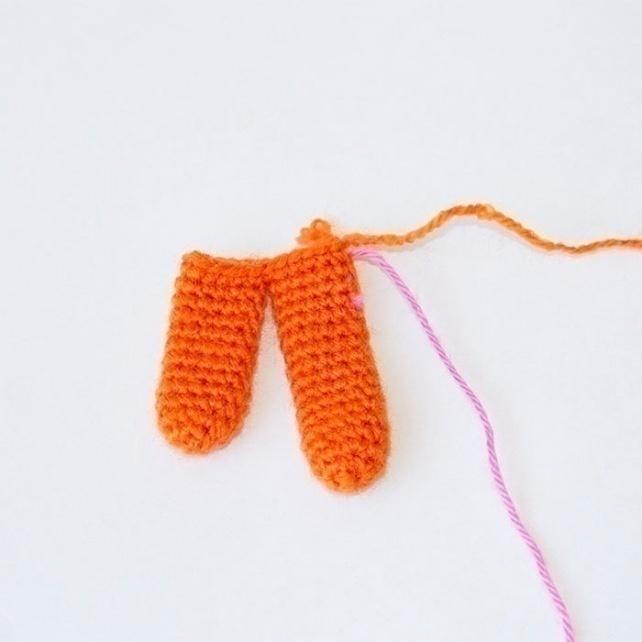
Toe (6 pcs), don’t cut the yarn - for 2 last toes
1 round 6 sc in a magic ring
2 round 6 inc = 12
3-4 rounds 12 sc
5 round (1 sc, dec)* 4 times = 8
6–11(6) rounds 8 sc
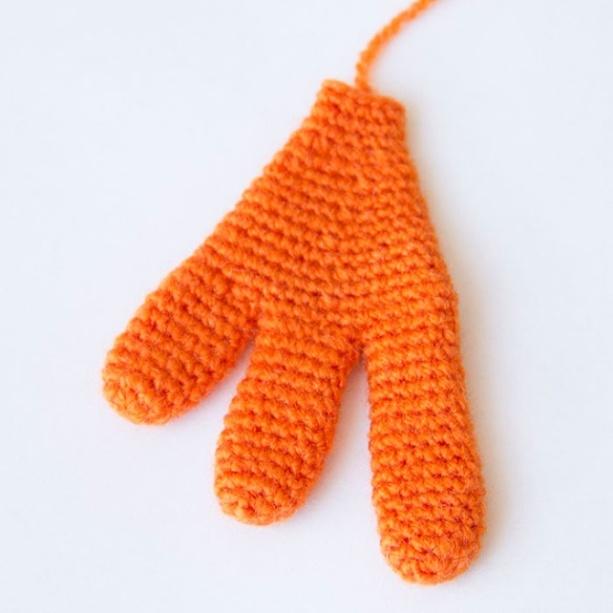
12 round joining the toes: 4 sc along the last toe, 4 sc along the middle one, 8 sc along the 1st one, 4 sc along the middle toe, 4 sc along the last one = 24 sc, install a stitch marker.
13 round 24 sc
14 round (2 sc, dec)* 6 times = 18
15 round (1 sc, dec)* 6 times = 12
16 round 2 sc, 3 ch, skip 3 st, 7 sc = 12
17 round 2 sc, 3 sc in the chains, 7 sc = 12
18 round 6 dec
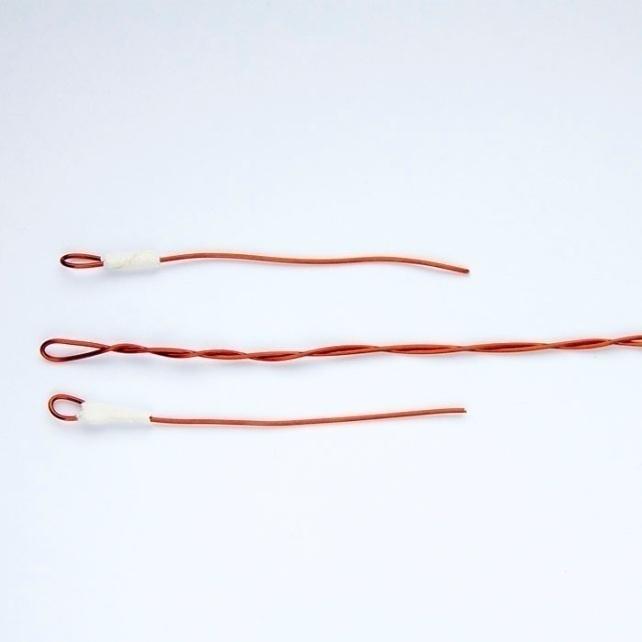
Stuff, install the wire in the toes: 2 pieces (in the last and first toes) by 9 cm of length, 1 pc. (in the middle toe) - about 27 cm. Attach them each to others, isolate the joining of the toes with scotch tape.

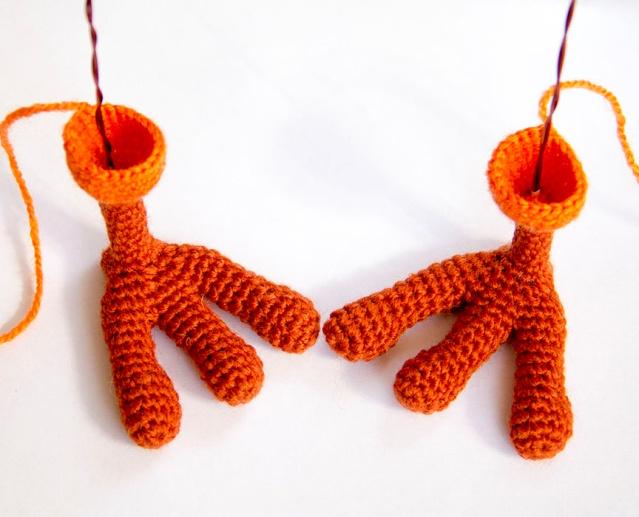
Work in the loops around the hole (the 16-17th rounds): make 8 sc
1-7(7) rounds 8 sc
Change the yarn to main (body) color
8 round 8 inc = 16
9 round 16 sc
10 round (1 sc, inc)* 8 times = 24
11-13(3) rounds 24 sc
Cut off the yarn, leave a long yarn tail for sewing
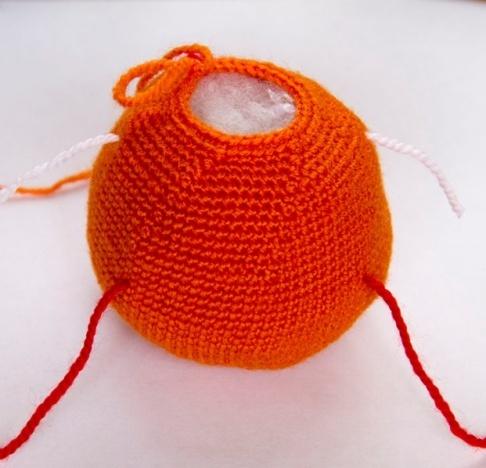
Body
1 round 6 sc in a magic ring
2 round 6 inc = 12
3 round (1 sc, inc)* 6 times = 18
4 round (2 sc, inc)* 6 times = 24
5 round (3 sc, inc)* 6 times = 30
6 round (4 sc, inc)* 6 times = 36
7 round (5 sc, inc)* 6 times = 42
8 round (6 sc, inc)* 6 times = 48
9 round (7 sc, inc)* 6 times = 54
10 round (8 sc, inc)* 6 times = 60
11 round (9 sc, inc)* 6 times = 66
12 round (10 sc, inc)* 6 times = 72
13 round (11 sc, inc)* 6 times = 78
14 round (12 sc, inc)* 6 times = 84
15-17(3) rounds 84 sc
18 round 30 sc, place a stitch marker ( here we will install the leg wireframe), 24 sc, place another stitch marker, 30 sc = 84
19-24(6) rounds 84 sc
25 round (12 sc, dec)* 6 times = 78
26 round 78 sc
27 round (11 sc, dec)* 6 times = 72
28 round 72 sc
29 round (10 sc, dec)* 6 times
= 66 + 3
30 round 15 sc, place a stitch marker ( we will install the wing wireframe here), 36 sc, place a marker, 15 sc = 66
31 round (9 sc, dec)* 6 times = 60
32 round 60 sc
33 round (8 sc, dec)* 6 times = 54
34 round (7 sc, dec)* 6 times = 48
35 round (6 sc, dec)* 6 times = 42
36 round (5 sc, dec)* 6 times = 36
37 round BLO: 36 sc
38 round (4 sc, dec)* 6 times = 30
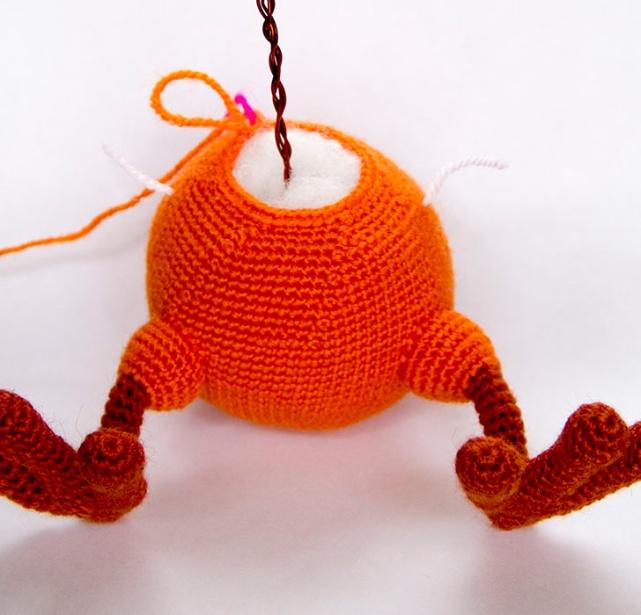

Install the leg wireframes, twist them together, stuff the body well.
Install the wing frames. Attach them to the spine wireframe. Isolate the connection with scotch tape.
39-40 rounds 30 sc
41 round (3 sc, dec)* 6 times = 24
42-43 rounds 24 sc
44 round (2 sc, dec)* 6 times = 18
45-46 rounds 18 sc
47 round (1 sc, dec)* 6 times = 12
48-54 rounds 12 sc
55 round (1 sc, inc)* 6 times = 18
Cut off the yarn, leave a long yarn tail for sewing

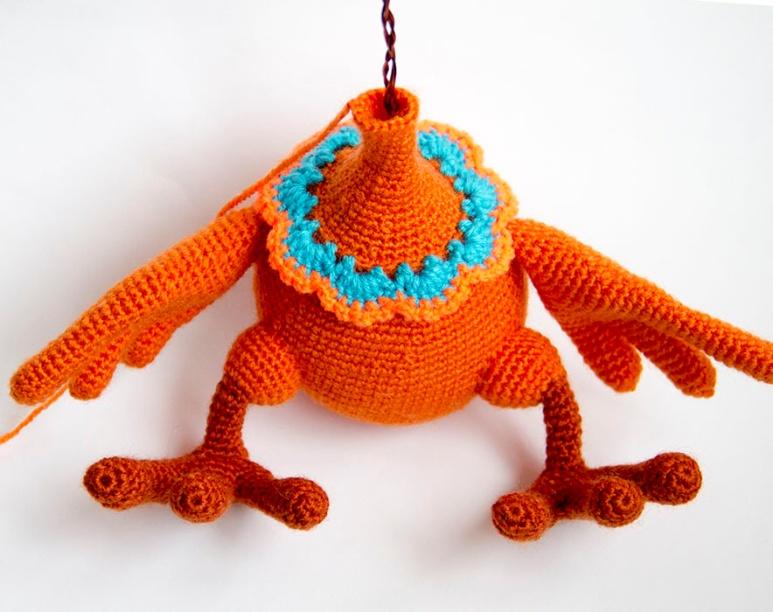
Collar
use color yarn of your choice
1 round Work in front loops of the 37th round:(3 ch, skip 1 st, 1 sc)* 18 times
2 round (5 dc in the arch, 1ch, 1 sc in the next arch, 1ch)* 9 times
3 round (1 sc, 1 ch ) in each stitch
Install the spine (body) wireframe in the head.
Sew the head to the body.
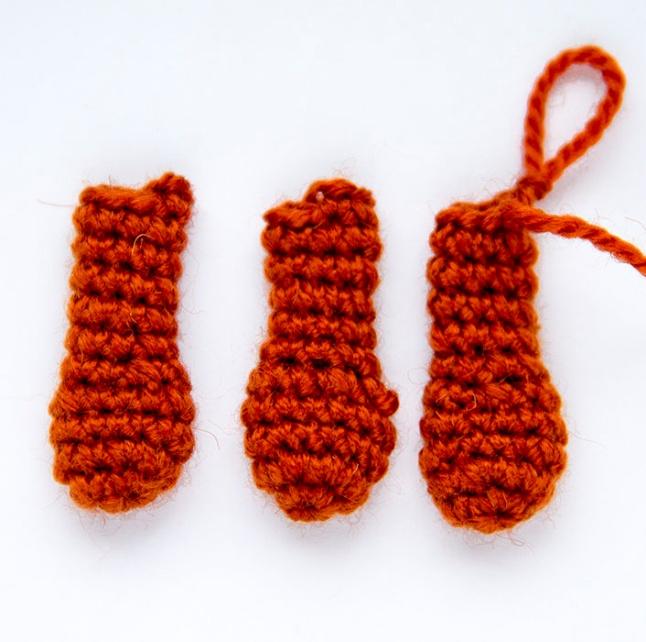
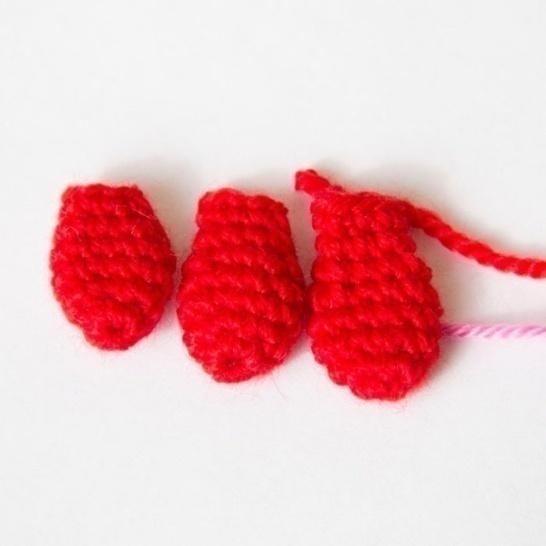
Chicken comb
Small part
1 round 6 sc in a magic ring
2 round 6 inc = 12
3-4 rounds 12 sc
5 round (dec, 4 sc)* 2 times = 10
6 round (dec, 3 sc)* 2 times = 8, cut off and fasten the yarn.
Middle part
1 round 6 sc in a magic ring
2 round 6 inc = 12
3-4 rounds 12 sc
5 round (dec, 4 sc)* 2 times = 10
6 round (dec, 3 sc)* 2 times = 8
7 round 8 sc, cut off and fasten the yarn.
Large part
1 round 6 sc in a magic ring
2 round 6 inc = 12
3-4 rounds 12 sc
5 round (dec, 4 sc)* 2 times = 10
6 round (dec, 3 sc)* 2 times = 8
7-8 rounds 8 sc, don’t cut the yarn
Join the parts in the comb:
9 round 4 sc along the large part, 4 sc along the middle one, 8 sc along the small one, 4 sc - middle part, 4 sc - large one = 24
10 round 24 sc
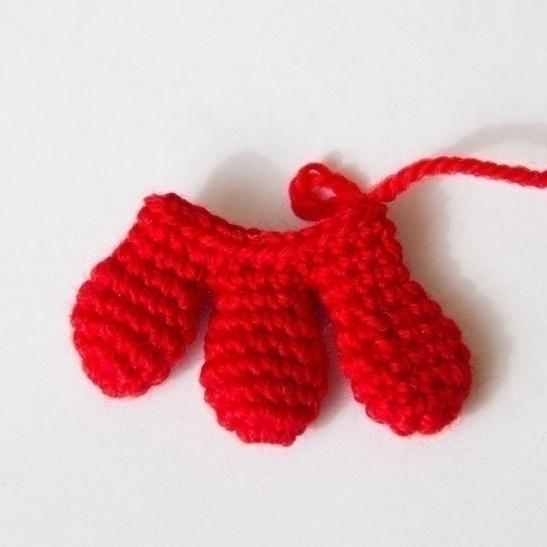
Sew the chicken comb on the head, the large part to forehead.
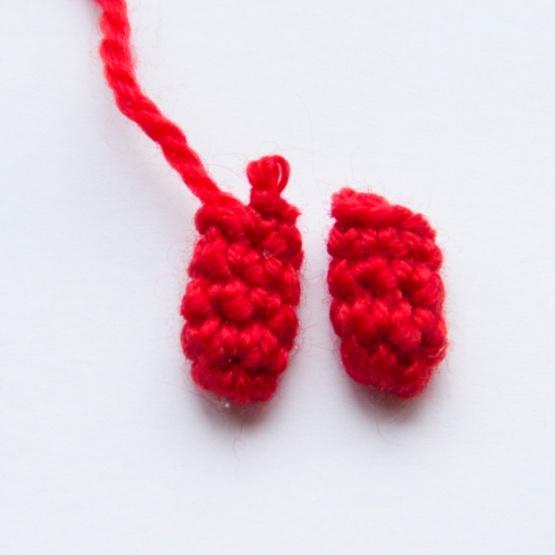
Beard (2 pcs)
1 round 6 sc in a magic ring
2-4(3) rounds 6 sc, don’t cut the yarn of the 2nd part
5 round (joining the beard parts): З sc along the 2nd part, apply the 1st part, make 6 sc, 3 sc along the 2nd part
Sew the beard to the beak lower part.
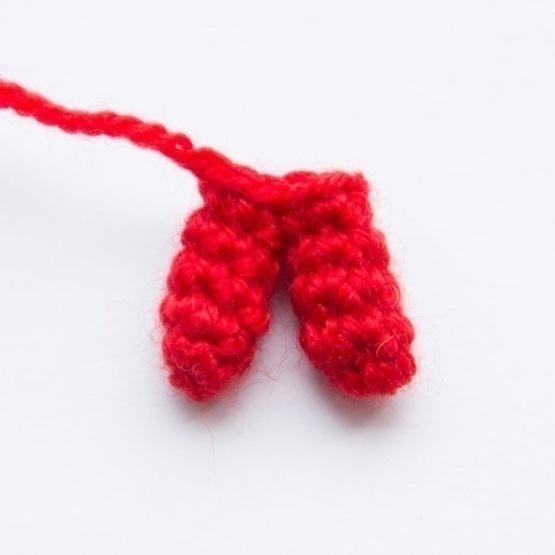
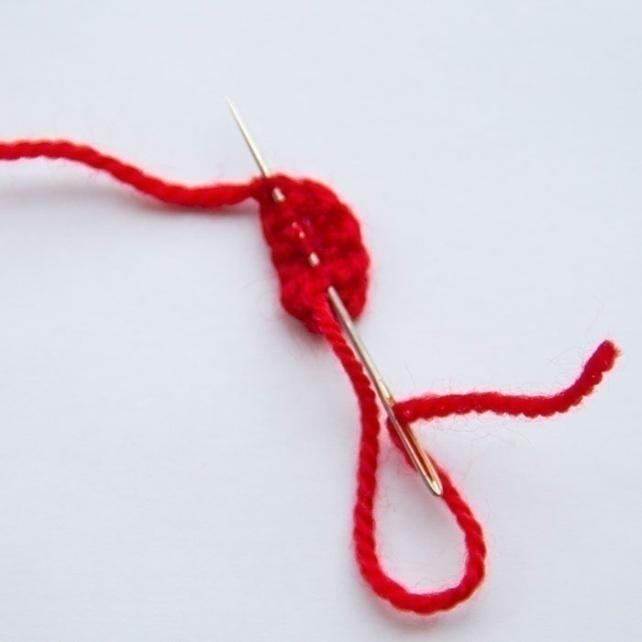
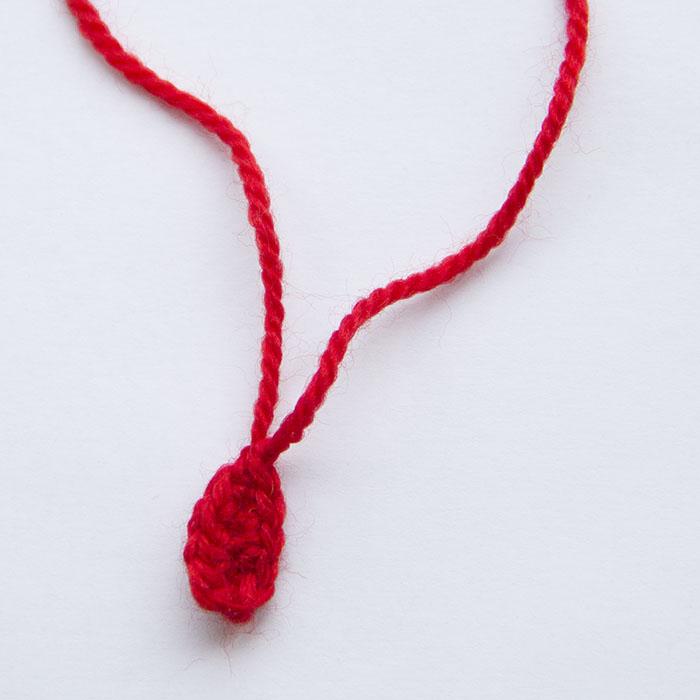
Earrings (2 pcs)
leave a long beginning yarn tail
1 round 5 ch
2 round start in the 2nd from the hook: 3 sc, 3 sc in the last st, make 3 sc in the back direction
З round 1 sc, 1 ch, cut off the yarn, leaving a long tail
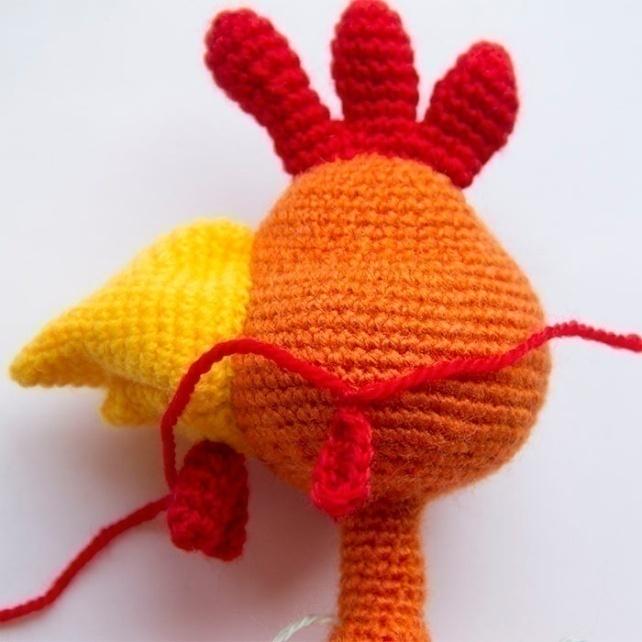
Attaching the earrings: work with the beginning yarn tail and a needle. Pull the tail through your earring toward the end of the 2nd round. Attach the earring to the cheek, tie the yarn tails with knot well. Hide the tails inside the head.
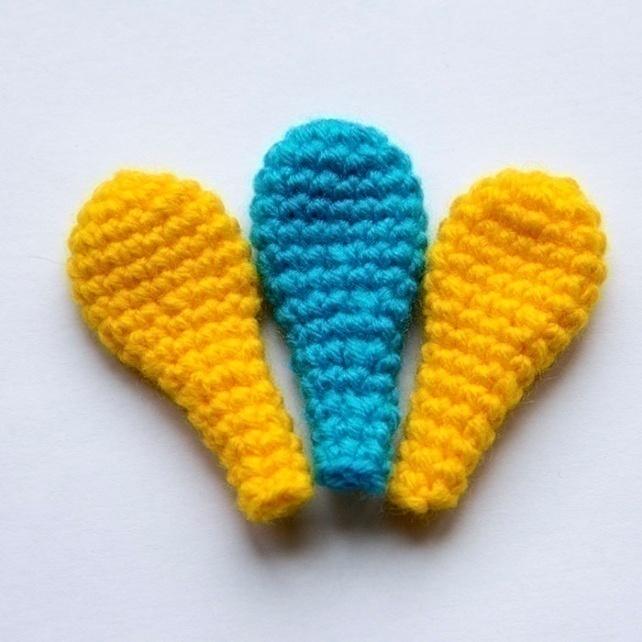
Tail feathers (3 pcs)
yarn colors of your choice
1 round 6 sc in a magic ring
2 round 6 inc = 12
3 round (2 sc, inc)* 4 times = 16
4-6(3) rounds 16 sc
7 round (2 sc, dec)* 4 times = 12
8 round 12 sc
9 round (dec, 4 sc)* 2 times = 10
10 round 10 sc
11 round (dec, 3 sc)* 2 times = 8
12 round 8 sc
13 round (dec, 2 sc)* 2 times = 6
14-15 rounds 6 sc.
Cut and fasten off the yarn.
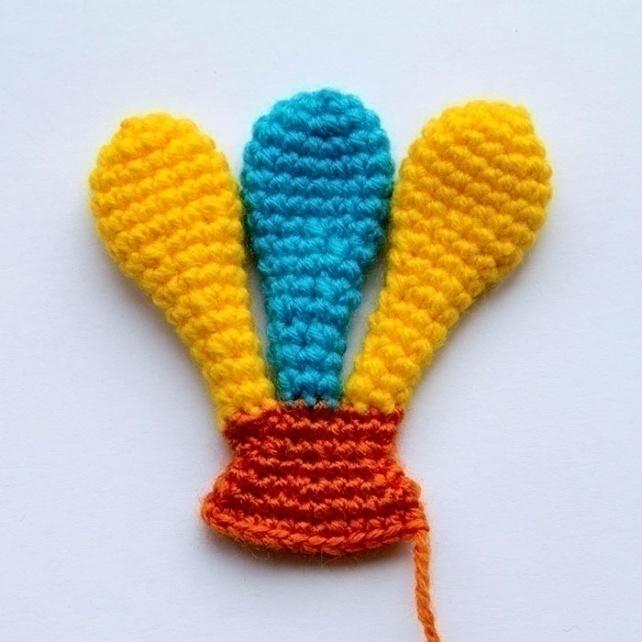
Joining the feathers, work with the body color yarn.
16 round 3 sc along the 1st feather, 3 sc along the 2nd one, 6 sc along the 3rd one, 3 sc along the 2nd one, 3 sc along the 1st one = 18
17 round 18 sc
18 round (1 sc, dec)* 6 times = 12
19 round (1 sc, inc)* 6 times = 18
20 round (2 sc, inc)* 6 times = 24
21 round 24 sc
Flatten the tail and join the edges with 11 sc. Sew the tail along the bottom, and a little on the sides.


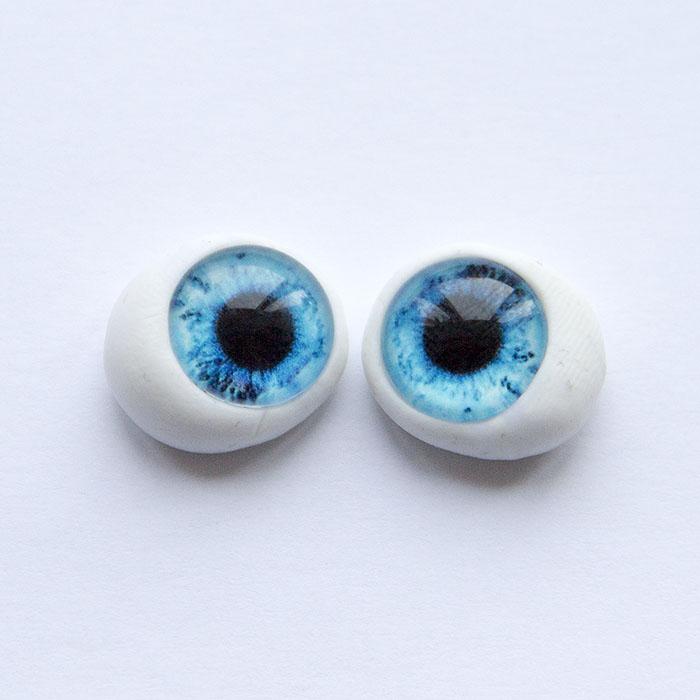
Eyes
Make the eye white part from plastic clay, put and press down plastic or glass eyes, bake as indicated in your clay instructions (plastic eyes must be removed for baking time).
Glue the eyes near the nose bridge on, glue on the eyelashes, sew on the eyelids.
Crochet the eyelids, trying on them to the eyes. If necessary, reduce or increase the amount of chains. You can also make crocheted or felted eyes.

Eyelids
1 round 10 ch
2 round start in the 2nd from the hook: 9 sc,
Try on, if necessary keep crocheting : ch, turn, dec, 5 sc, dec = 7 sc
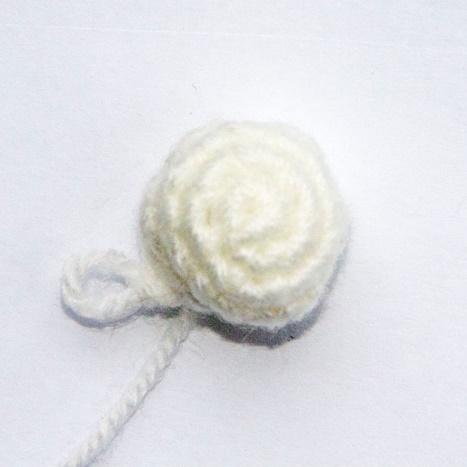
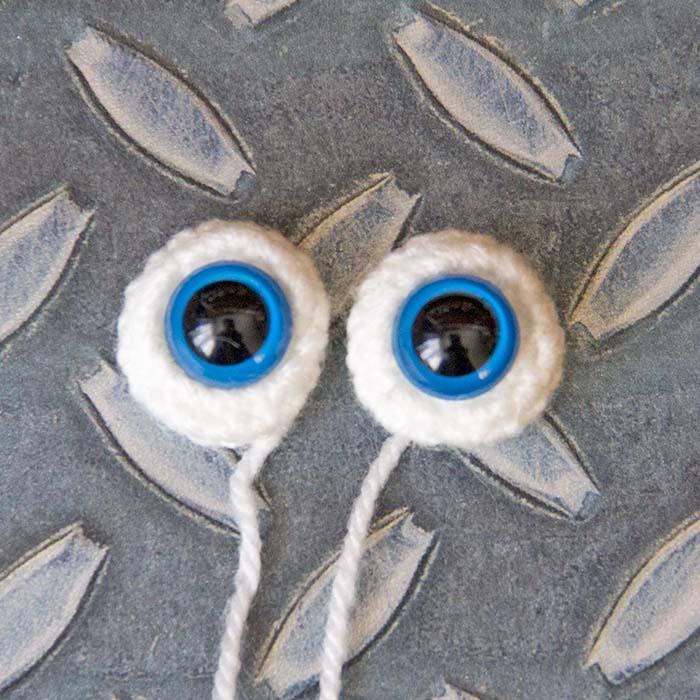
Crochet eyes
Use the thinner yarn than your main yarn and a smaller hook
1 round 6 sc in a magic ring, tighten a hole lightly
2 round 6 inc = 12
З round (1 sc, inc)* 6 times = 18
4 round 18 sc
5 round (1 sc, dec)* 6 times = 12
Don’t stuff, install safety plastic eyes in the hole. Sew the eyes on.

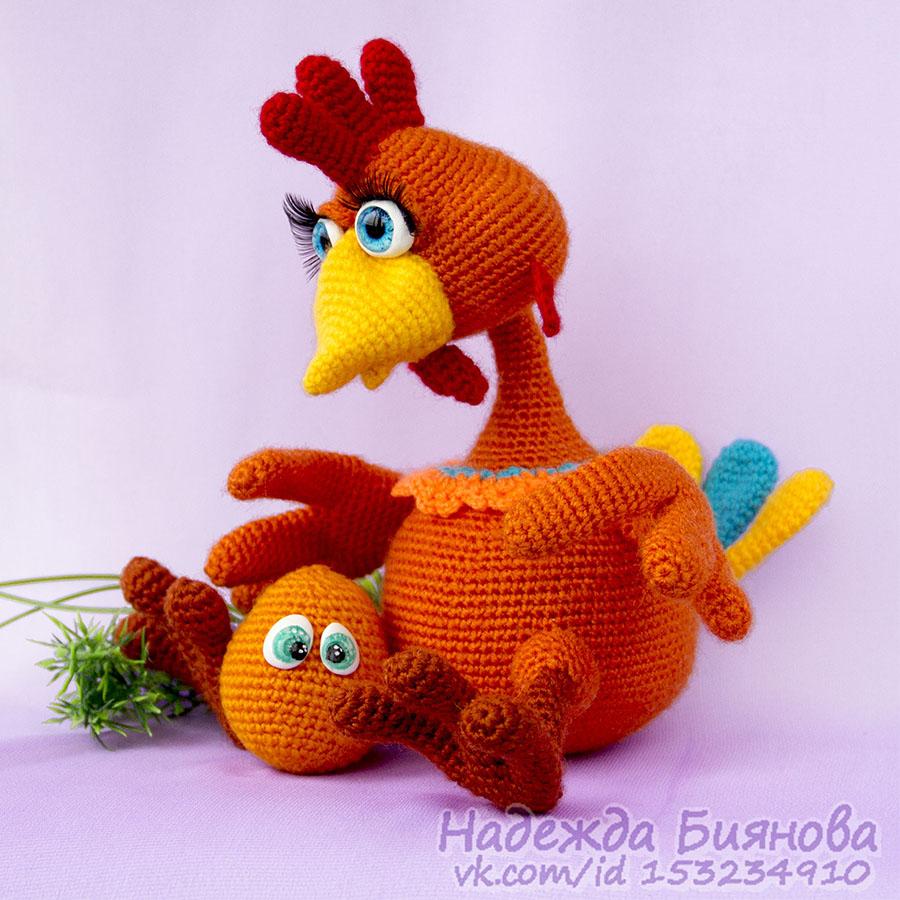
Egg
1 round 6 sc in a magic ring
2 round 6 inc = 12
З round (1 sc, inc)* 6 times = 18
4 round (2 sc, inc)* 6 times = 24
5 round (3 sc, inc)* 6 times = 30
6 round (4 sc, inc)* 6 times = 36
7 round 36 sc
8 round (5 sc, inc)* 6 times = 42
9-12(4) rounds 42 sc
13 round (5 sc, dec)* 6 times = 36
14-15 rounds 36 sc
16 round (4 sc, dec)* 6 times = 30
17-18 rounds 30 sc
19 round (3 sc, dec)* 6 times = 24
20 round 24 sc
21 round (2 sc, dec)* 6 times = 18
22 round (1 sc, dec)* 6 times = 12
23 round 6 dec
The egg looks cuter if you decorate it with eyes.

Your chicken Mania is ready!
Bonjour Je pense qu'il y a un problèmes dans le descriptif de la grande plume pour l'aile . Je pense que ca doit etre du rang 3 au rang 16 et non au rang 6 merci
ReplyDeleteVelice krásné povedlo se mi to celé
ReplyDelete